What it’s Like Hiking Angels Landing
In some ways hiking Angels Landing was exactly what I thought it would be; and in other ways it was not at all what I expected!
Once I got a taste of epic National Park hikes after hiking Half Dome last summer, I knew I wanted to tackle another big one this year. Angels Landing kept sneakily finding its way into my feed, and my fomo was kicking in. So when our anniversary came around, an extended weekend trip to Zion was an easy choice.
We booked the trip somewhat last-minute, so we did not have the advance lottery permits to hike Angels Landing. But after some online research, I saw that last-minute permits may be available so we crossed our fingers and booked the trip anyways. And it worked out!
This post is all about what it’s like hiking Angels Landing in Zion National Park Utah.
This post may contain affiliate links, which means that I may receive a commission if you make a purchase using these links at no cost to you. As an Amazon Associate I earn from qualifying purchases at no additional cost to you.
What it’s Like Hiking Angels Landing
Hiking Angels Landing is one of those experiences you’ll remember forever. It’s challenging, but rewarding. Painful, but fun. Exhausting, but relaxing. So many emotions!
Tackling this hike does require some advance planning. But if you’re fortunate enough to grab a permit and you know what to expect, I promise you will not regret it.
What is Angels Landing?
Angels Landing is a popular hike in Zion National Park in Springdale, Utah. The hike is moderately strenuous with 1,488 ft of elevation gain over 5.4 miles out and back.
The name comes from a minister who visited the area over 100 years ago and said that peak was so high “only angels could land there”.
The highlight of this hike is the last section between Scouts Lookout and Observation Point. There are steep drop-offs and chains for stability. The views from Observation Point, the peak, are stunning.
Angels Landing Permits
Let’s answer some of the most common questions about Angels Landing permits and the lottery system.
Are Permits Required to Hike Angels Landing?
Sort of. You can hike all the way up to Scouts Lookout without a permit, but you will need one to continue onto the final section across the ridge to reach Observation Point. Permits are used to avoid overcrowding on the steep portion of the hike, which is the iconic and most dangerous section.
How to Apply for a Permit
There are currently two options for obtaining a permit to hike Angels Landing.
- Advance Seasonal Lottery – Applications open January 1, April 1, July 1, and October 1 and stay open for 20 days. Permits are then awarded for the following few months. So at maximum, you can grab a permit around 4 months in advance (visit the nps.gov website for more info and dates).
- Day-Before Lottery – If you don’t snag an advance seasonal lottery, you can apply the day before for a next-day permit. This is the method we used and we got a permit on our first try! However, there is no guarantee, so an advance seasonal permit is preferred if you can get one.
There is a non-refundable $6 fee to apply, and you can reserve permits for up to 6 people per reservation.
Preparing for the Hike
We went in the summer, so it was pretty hot (mid-90s during the day). The smart choice would have been to start early. But is that what we did? Absolutely not.
Instead we slept in, got coffee and avocado toast at FeelLove, and got a late start around 11:30am. A slow morning just felt right. But we came prepared with a lot of water and full hydration packs, so that helped us get through the peak heat of the day.
What to Pack
This day hike essentials packing list includes all of my favorite hiking items. But these are the top 5 things you’ll need for Angels Landing:
- Hydration Pack
- Sunglasses
- Hiking Boots
- Snacks
- Angels Landing Permit + your ID
We made sure to pack some of our favorite snacks. That means a French loaf for Cody and hot Cheetos for me, plus some nuts, protein bars and fruit.
And I made sure to take a screenshot of our permit email in case there was no signal, and text it to Cody so we both had copies just in case.
Getting to the Angels Landing Trailhead
If you’re into glamping, AutoCamp Zion is one of our faves! We actually stayed here the last few days of the trip, after the big hike. It’s about 15-20 minutes away, but you can park at the Visitor’s Center.
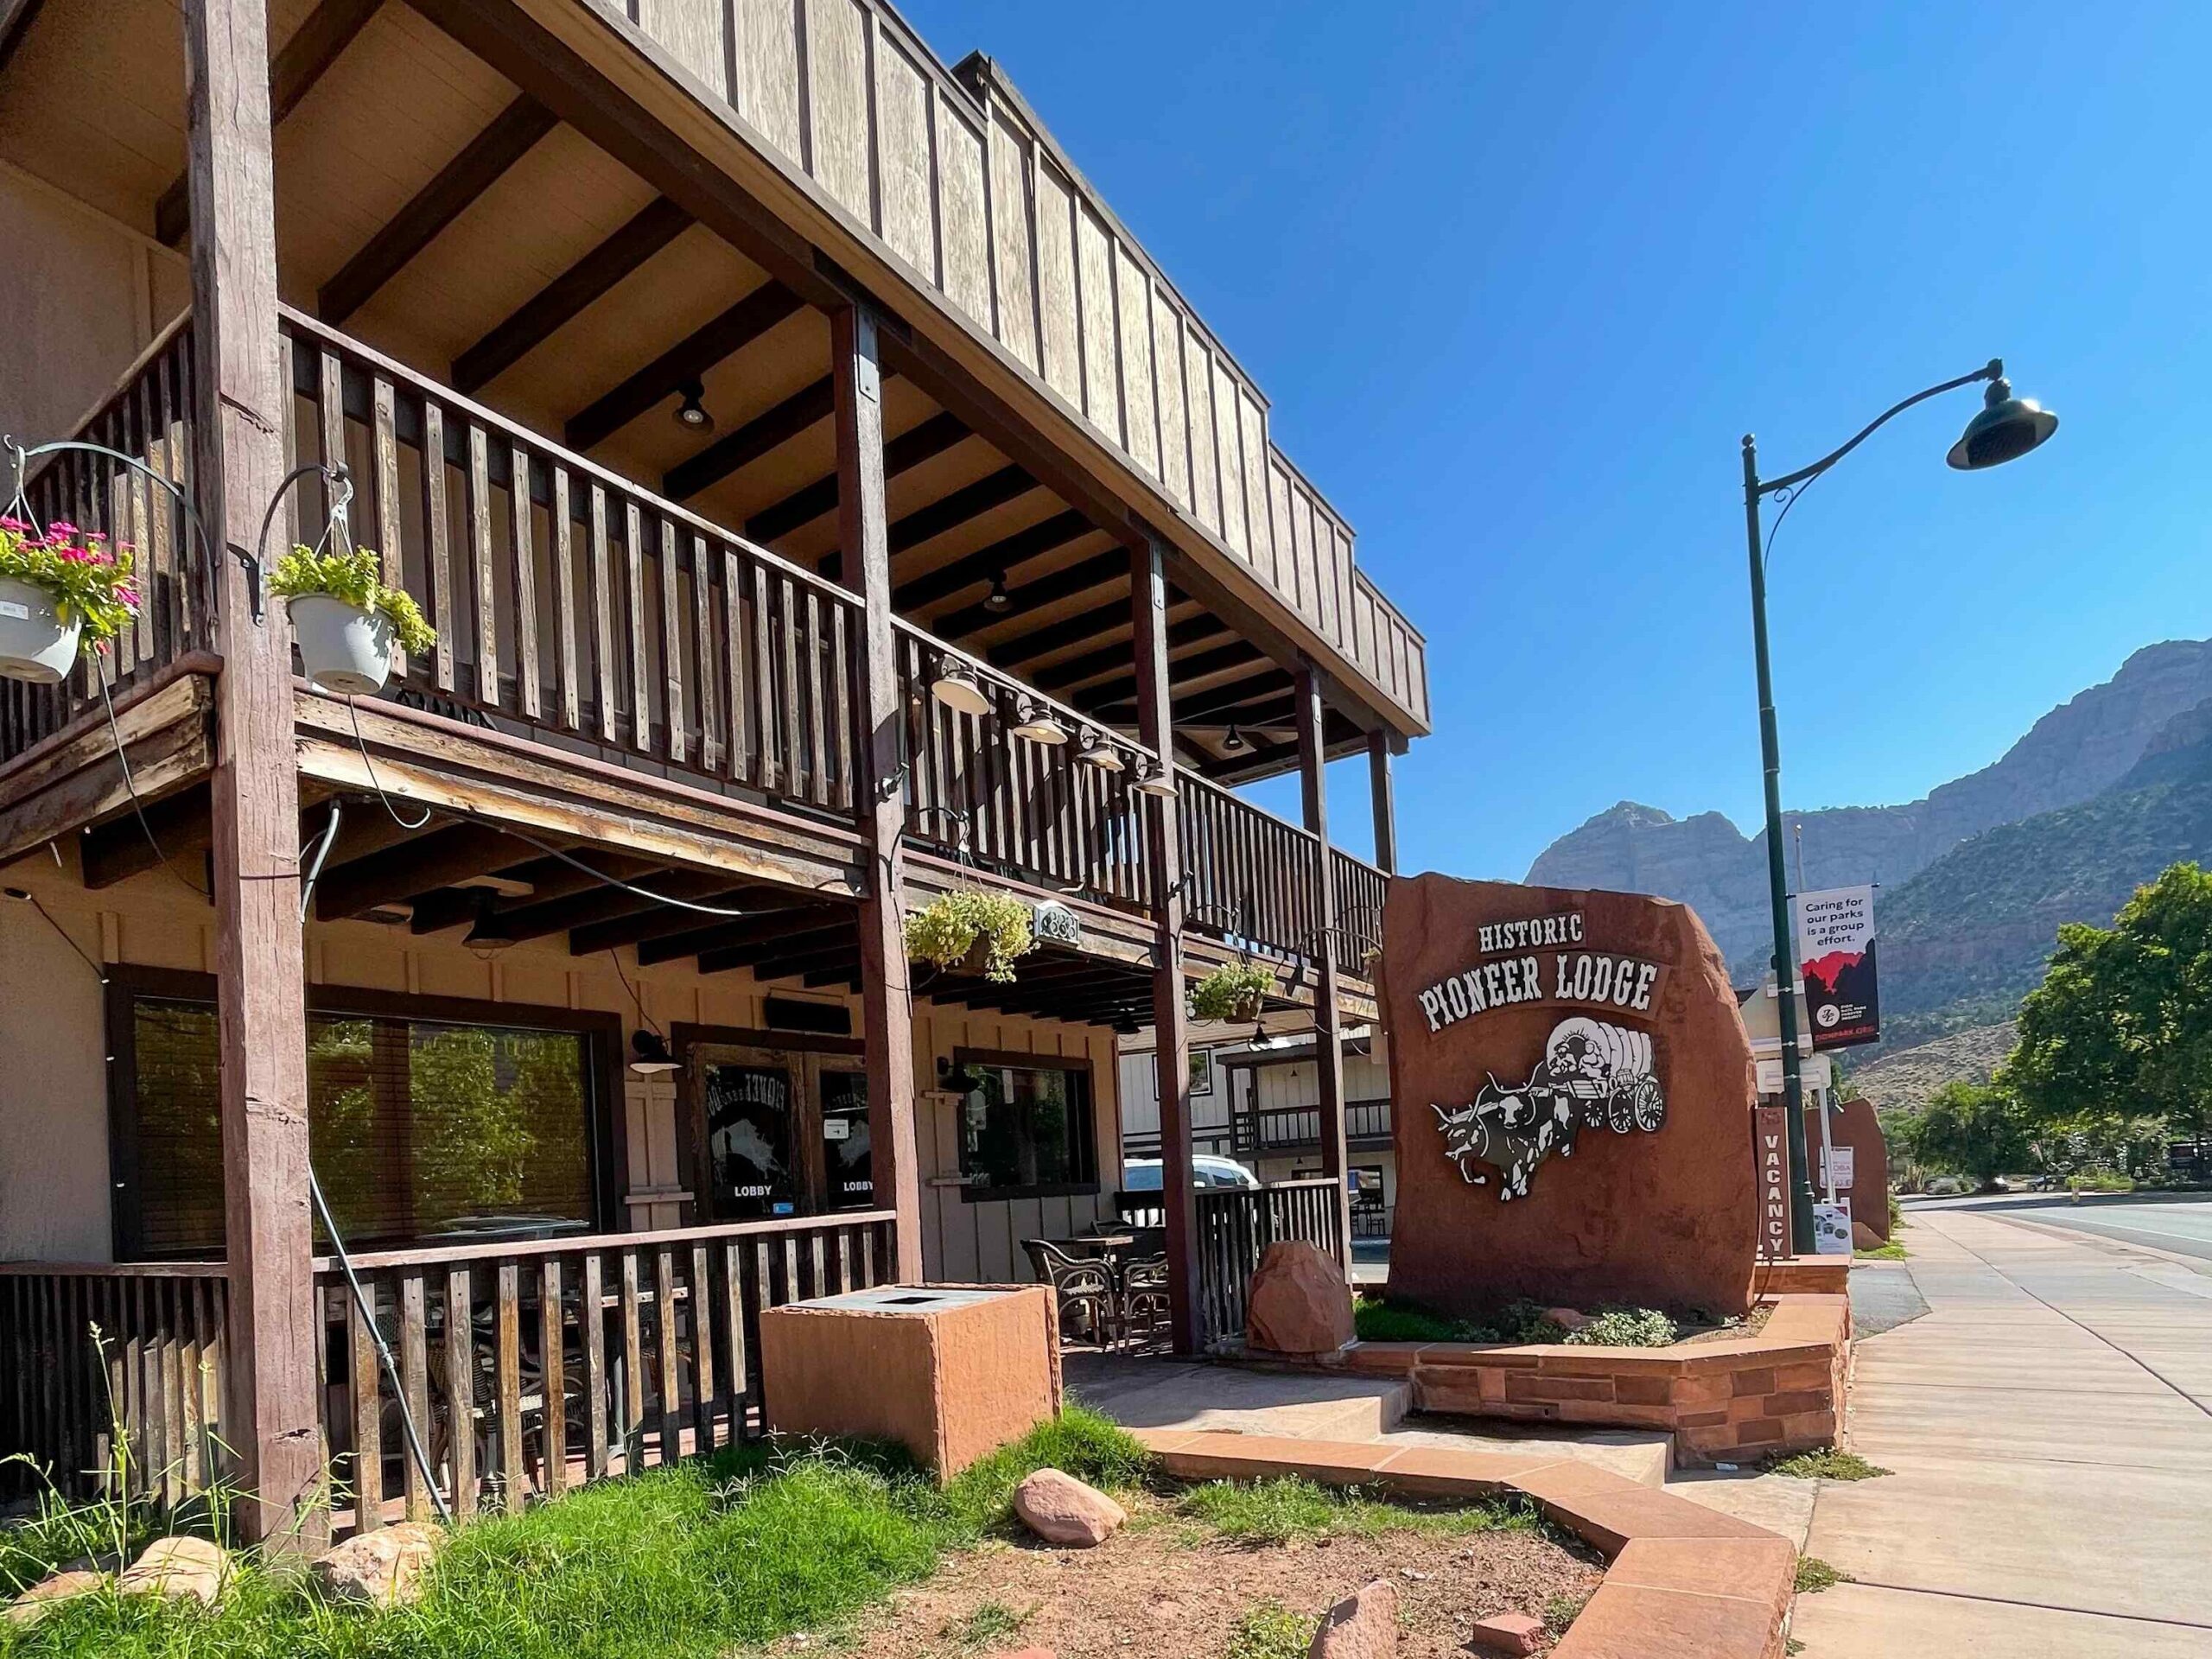
The night before hiking Angels Landing we stayed in Springdale at the Pioneer Lodge, so we rode the free shuttle into the park. It was super convenient, so I highly recommend staying nearby if you’re hiking!
There are two shuttles. One shuttle runs between the Springdale hotels and parking areas to the Zion National Park Visitors Center. Then a separate shuttle takes you from the Visitor Center, where the entrance fee is paid, up the Zion Canyon inside the park.
Zion National Park Entrance Fees
Every person that enters Zion National Park, whether by foot, bicycle, shuttle or car, is required to purchase an entrance pass. Those fees start at $35 per car, $30 per motorcycle or $20 per person if entering by foot. The website also mentions a $20 rate per SNOWMOBILE. Not sure how you’d pull that off, but hey… it’s an option.
There is also an annual park pass at $80, which we purchase last year when we hiked Half Dome in Yosemite National Park, and used in Hawaii at Haleakala. Definitely worth it if you plan on visiting a few parks.
Shuttle Stop 6 (The Grotto)
The shuttle ride from the Visitor Center up into the canyon was one of my favorite parts! It takes about 30 minutes, but it adds to the anticipation and was a fun way to soak in the scenery. Zion is absolutely beautiful and I just could not get enough of the beautiful red rocks and scenery at every turn.
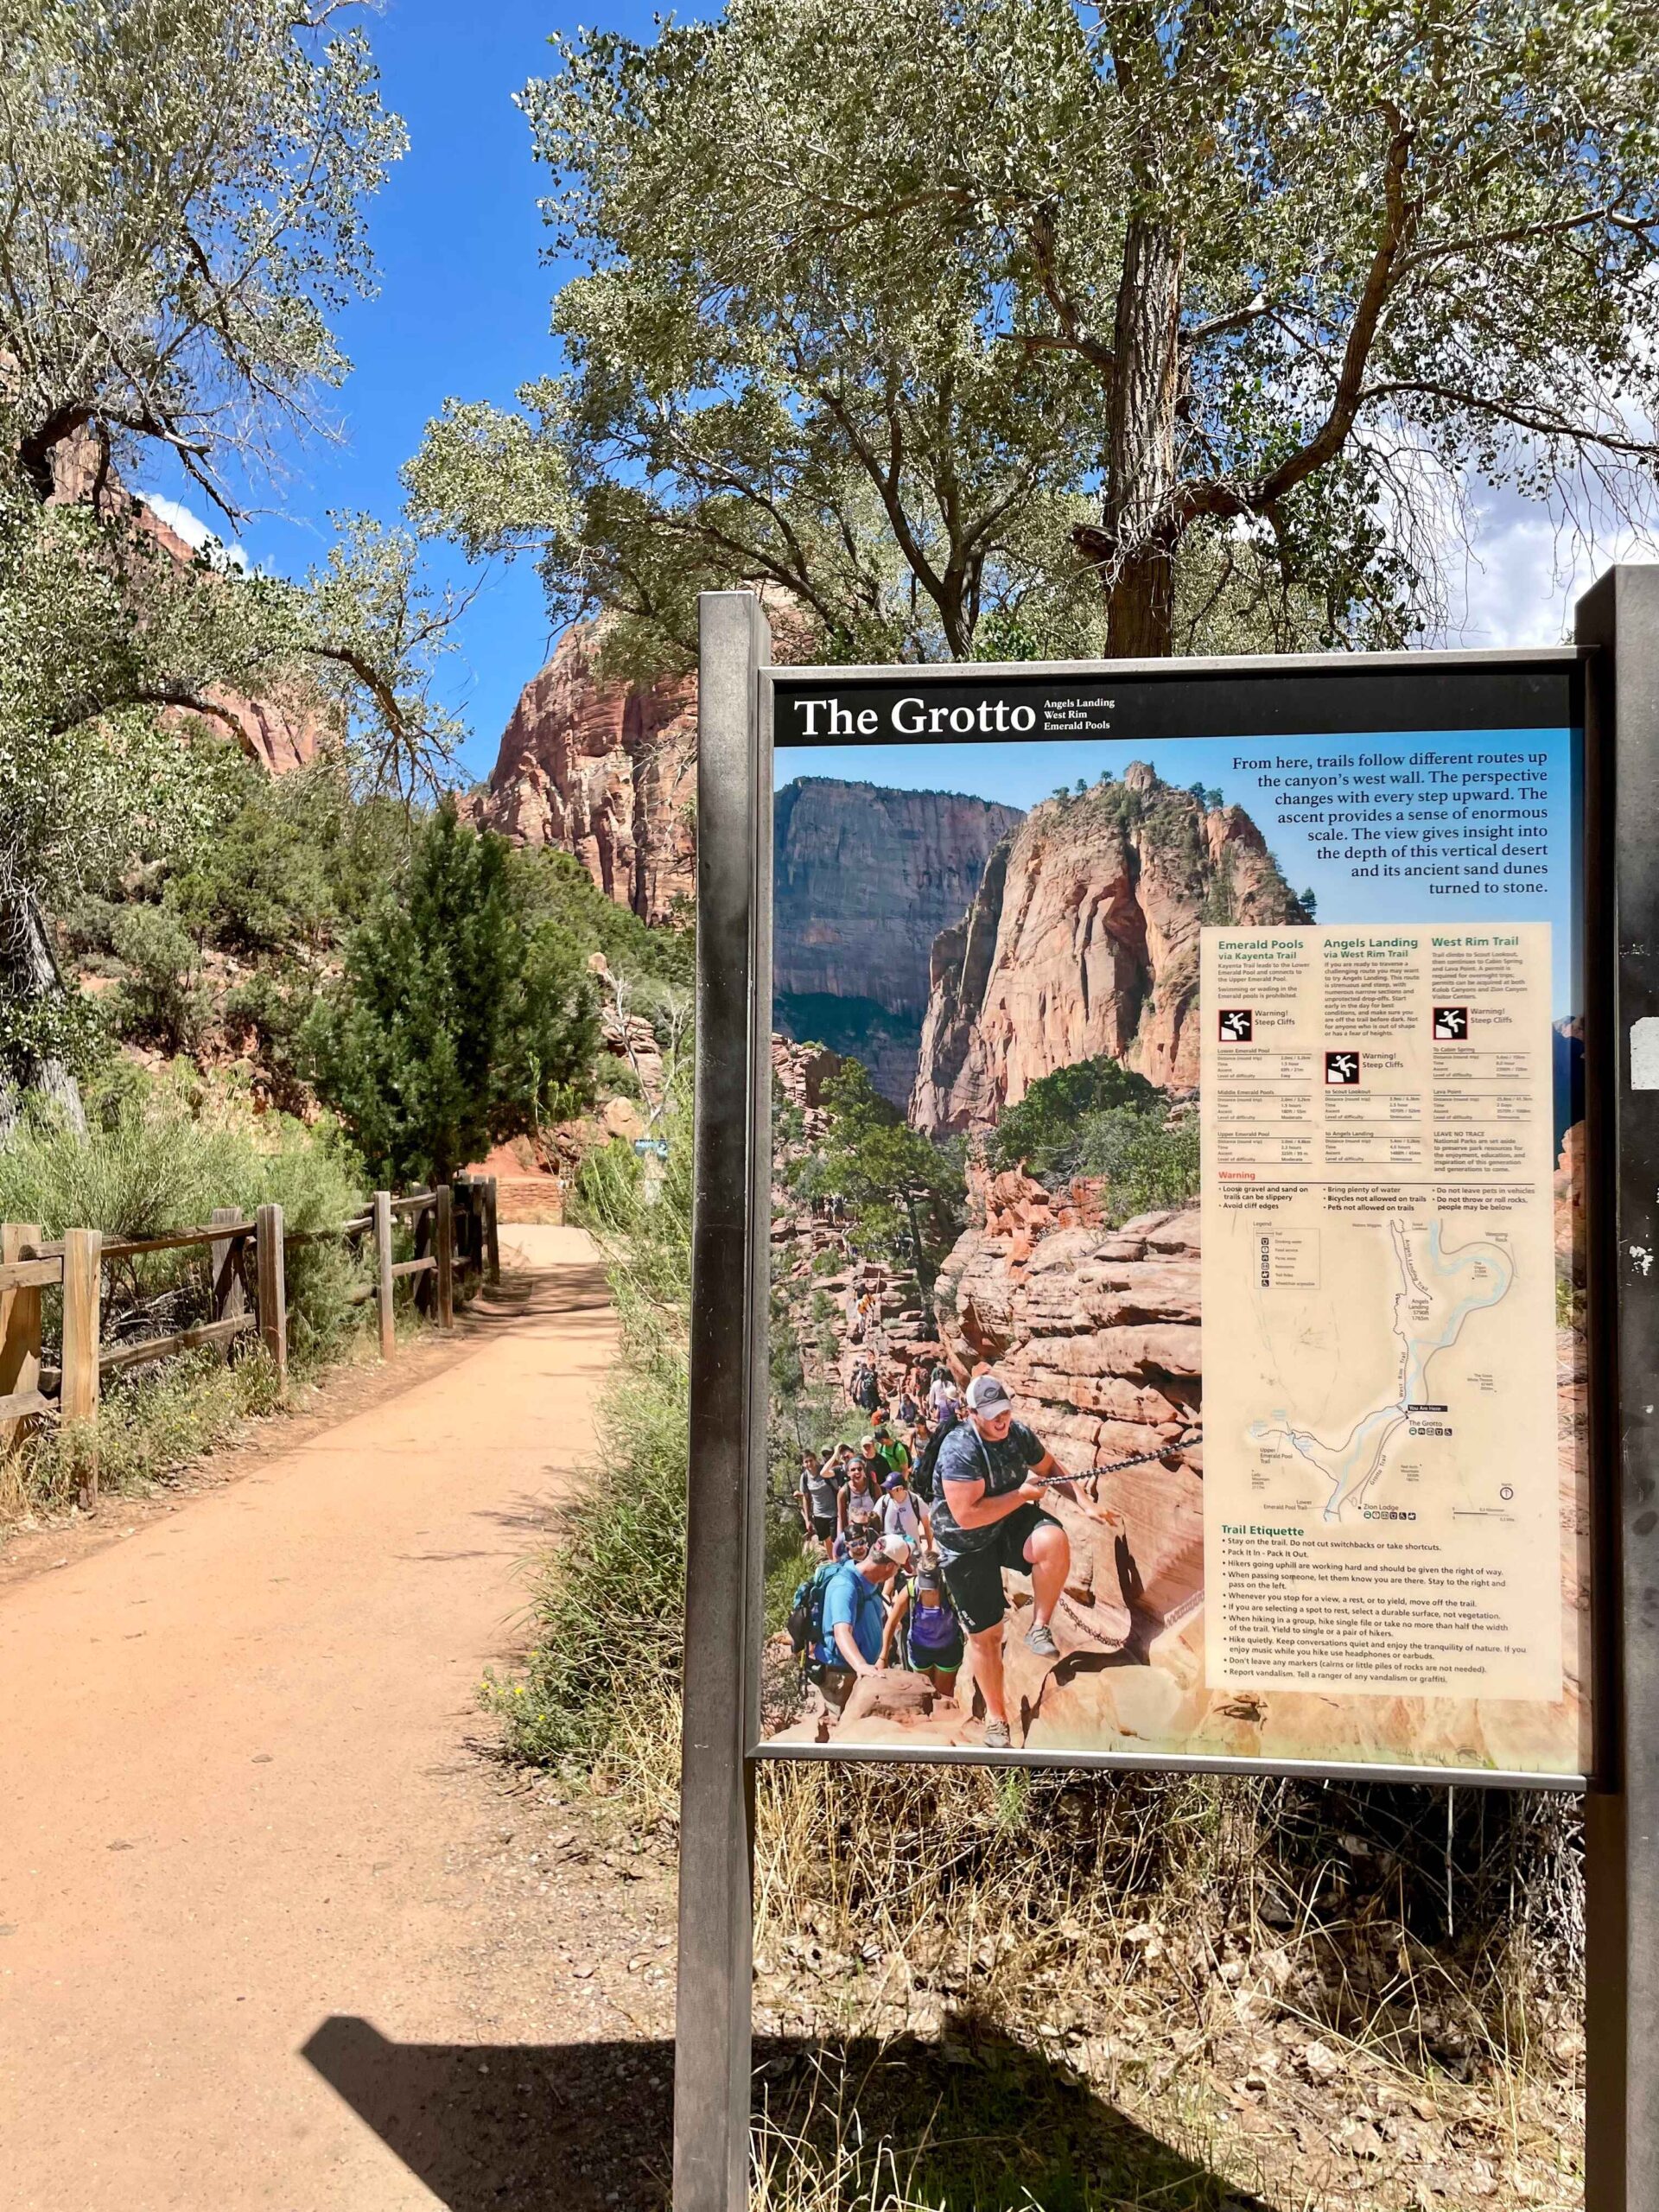

There is a restroom at The Grotto (stop 6). Last chance before the hike begins!
Then a quick walk across the street and over the bridge that crosses the Virgin River puts you right at the West Rim Trailhead, where the hike begins.
Sections of the Angels Landing Hike
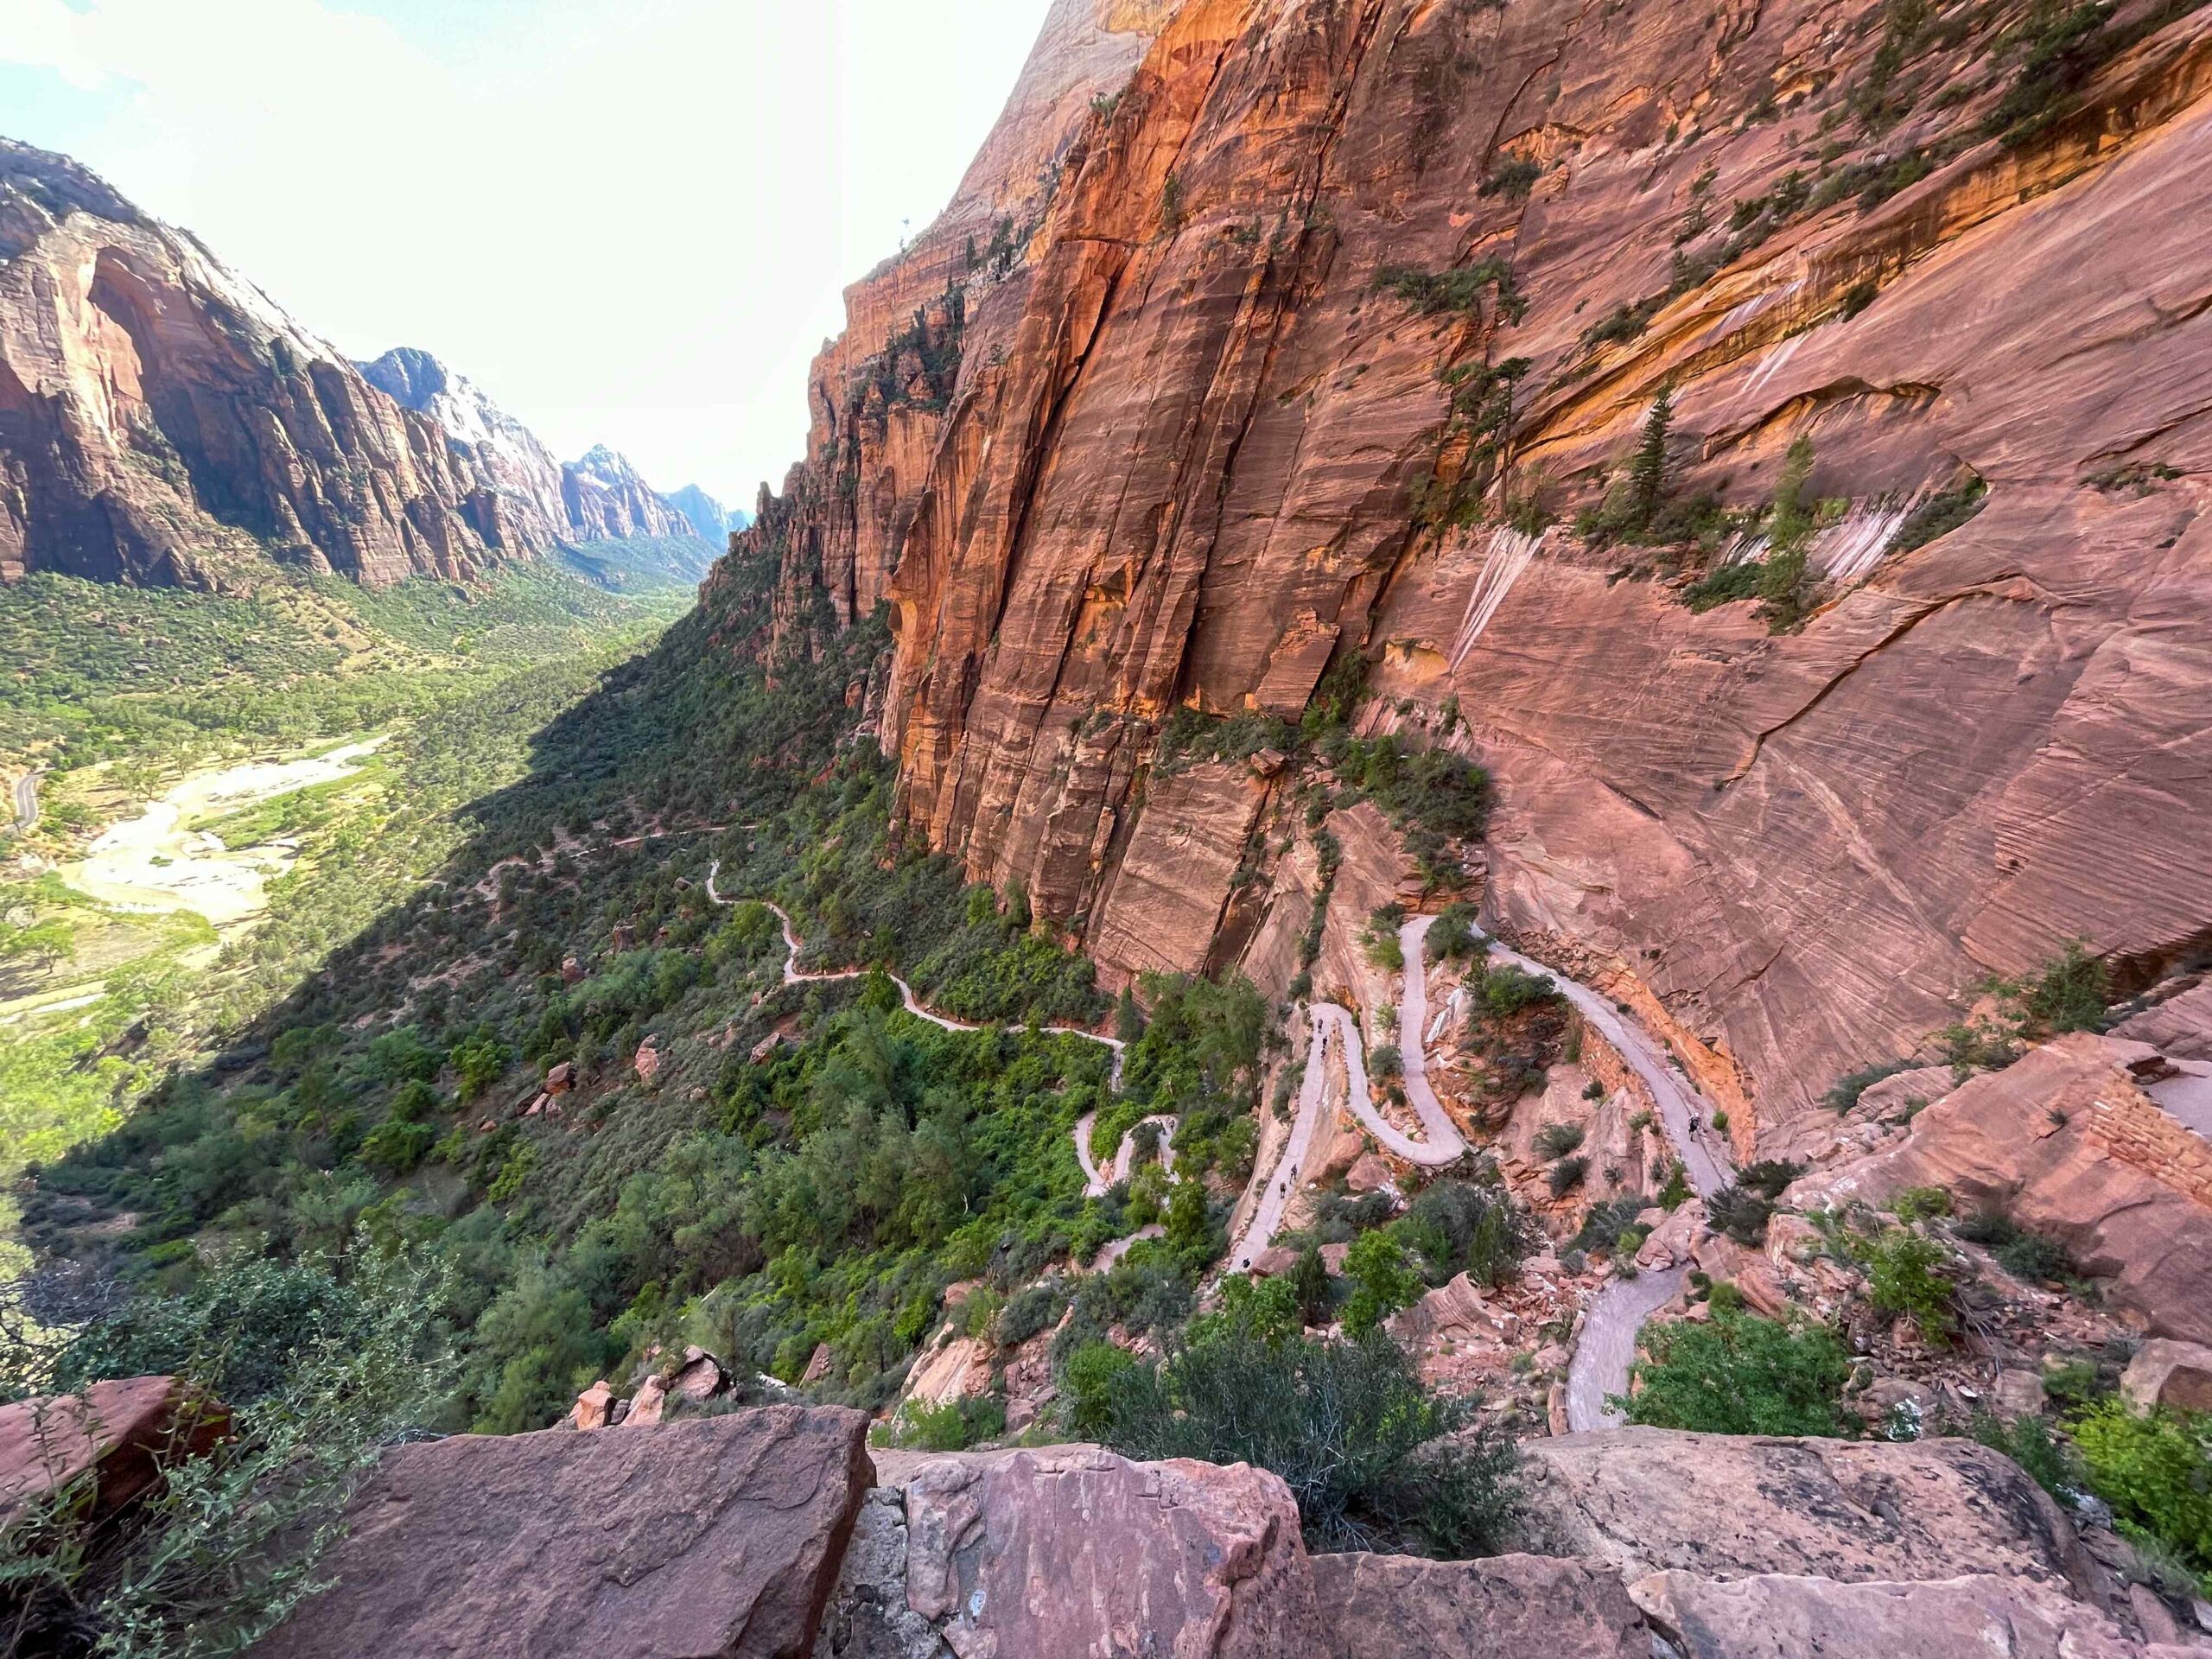
1. West Rim Trail
The hike begins on the West Rim trail following a paved path that begins somewhat flat and then moves up into a few larger switchbacks. The beginning of the hike faces the Angels Landing peak straight ahead and forces you to face the reality of the climb you’re embarking on.
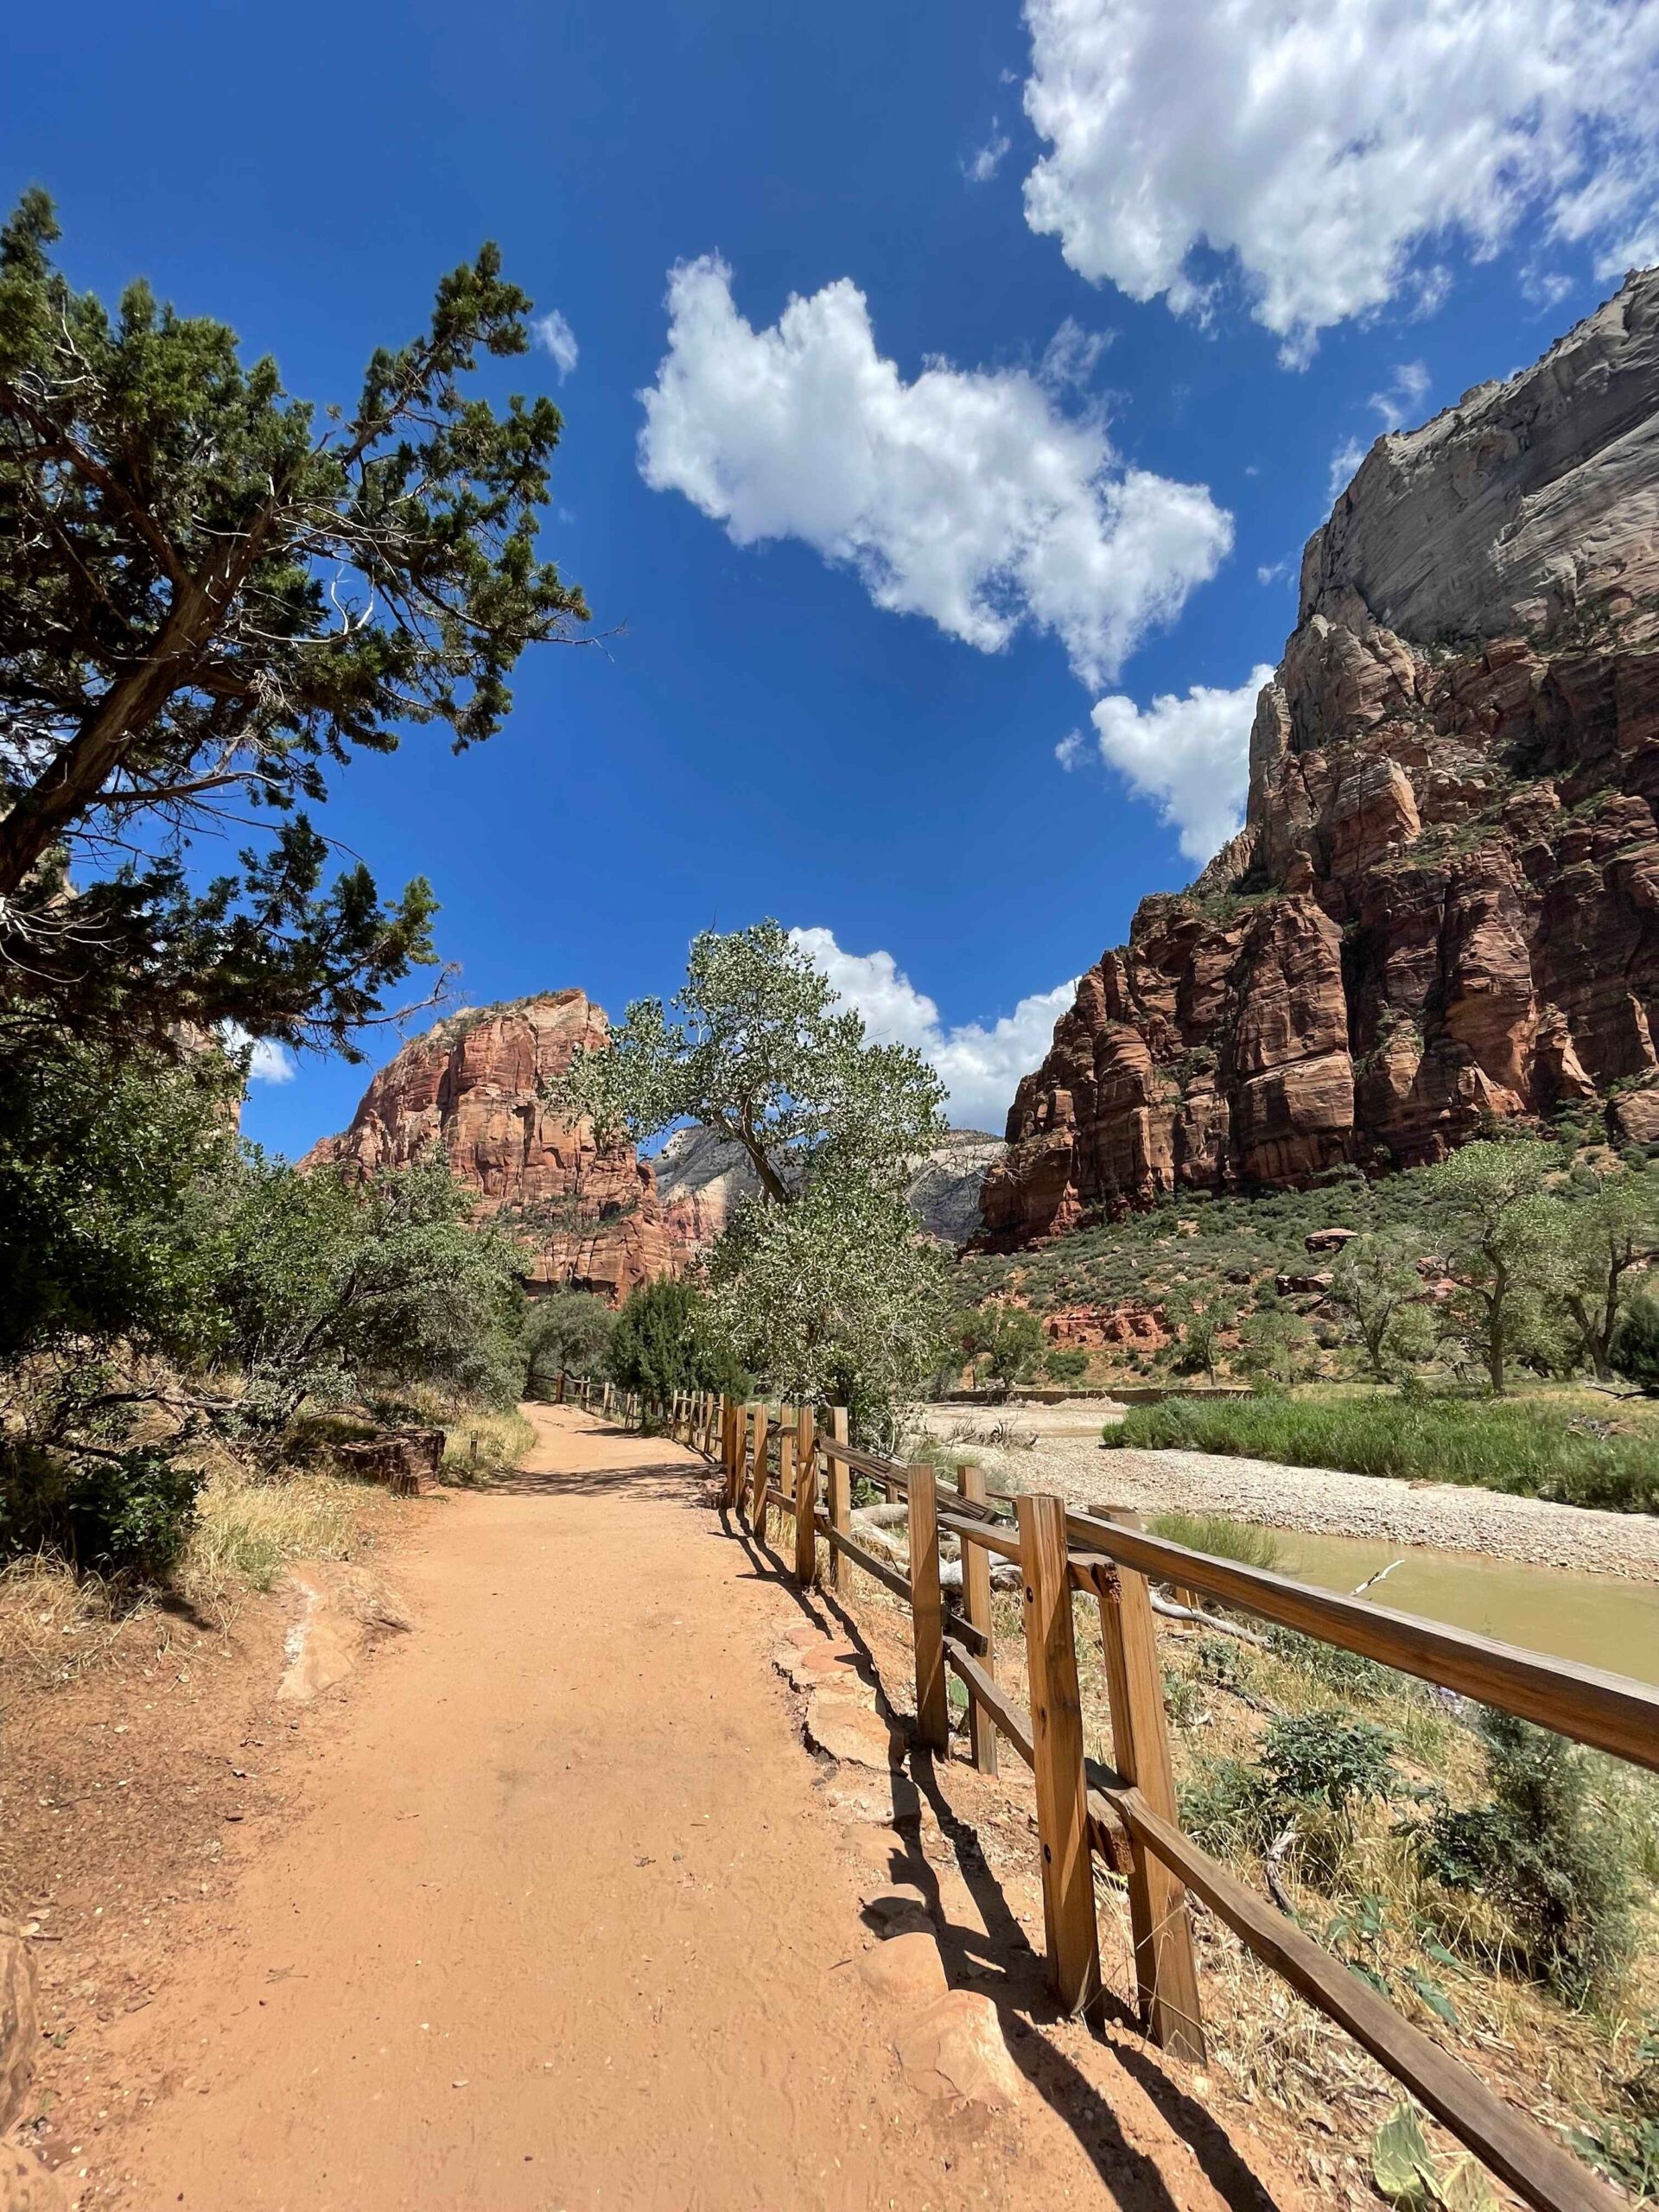
When I first saw the switchbacks that began to climb the red rock, I figured these were the Walter’s Wiggles I had read about. WRONG. Those are much further ahead and much steeper, haha.
This portion of the hike is exposed to the sun. But don’t worry, there will be some shade ahead!
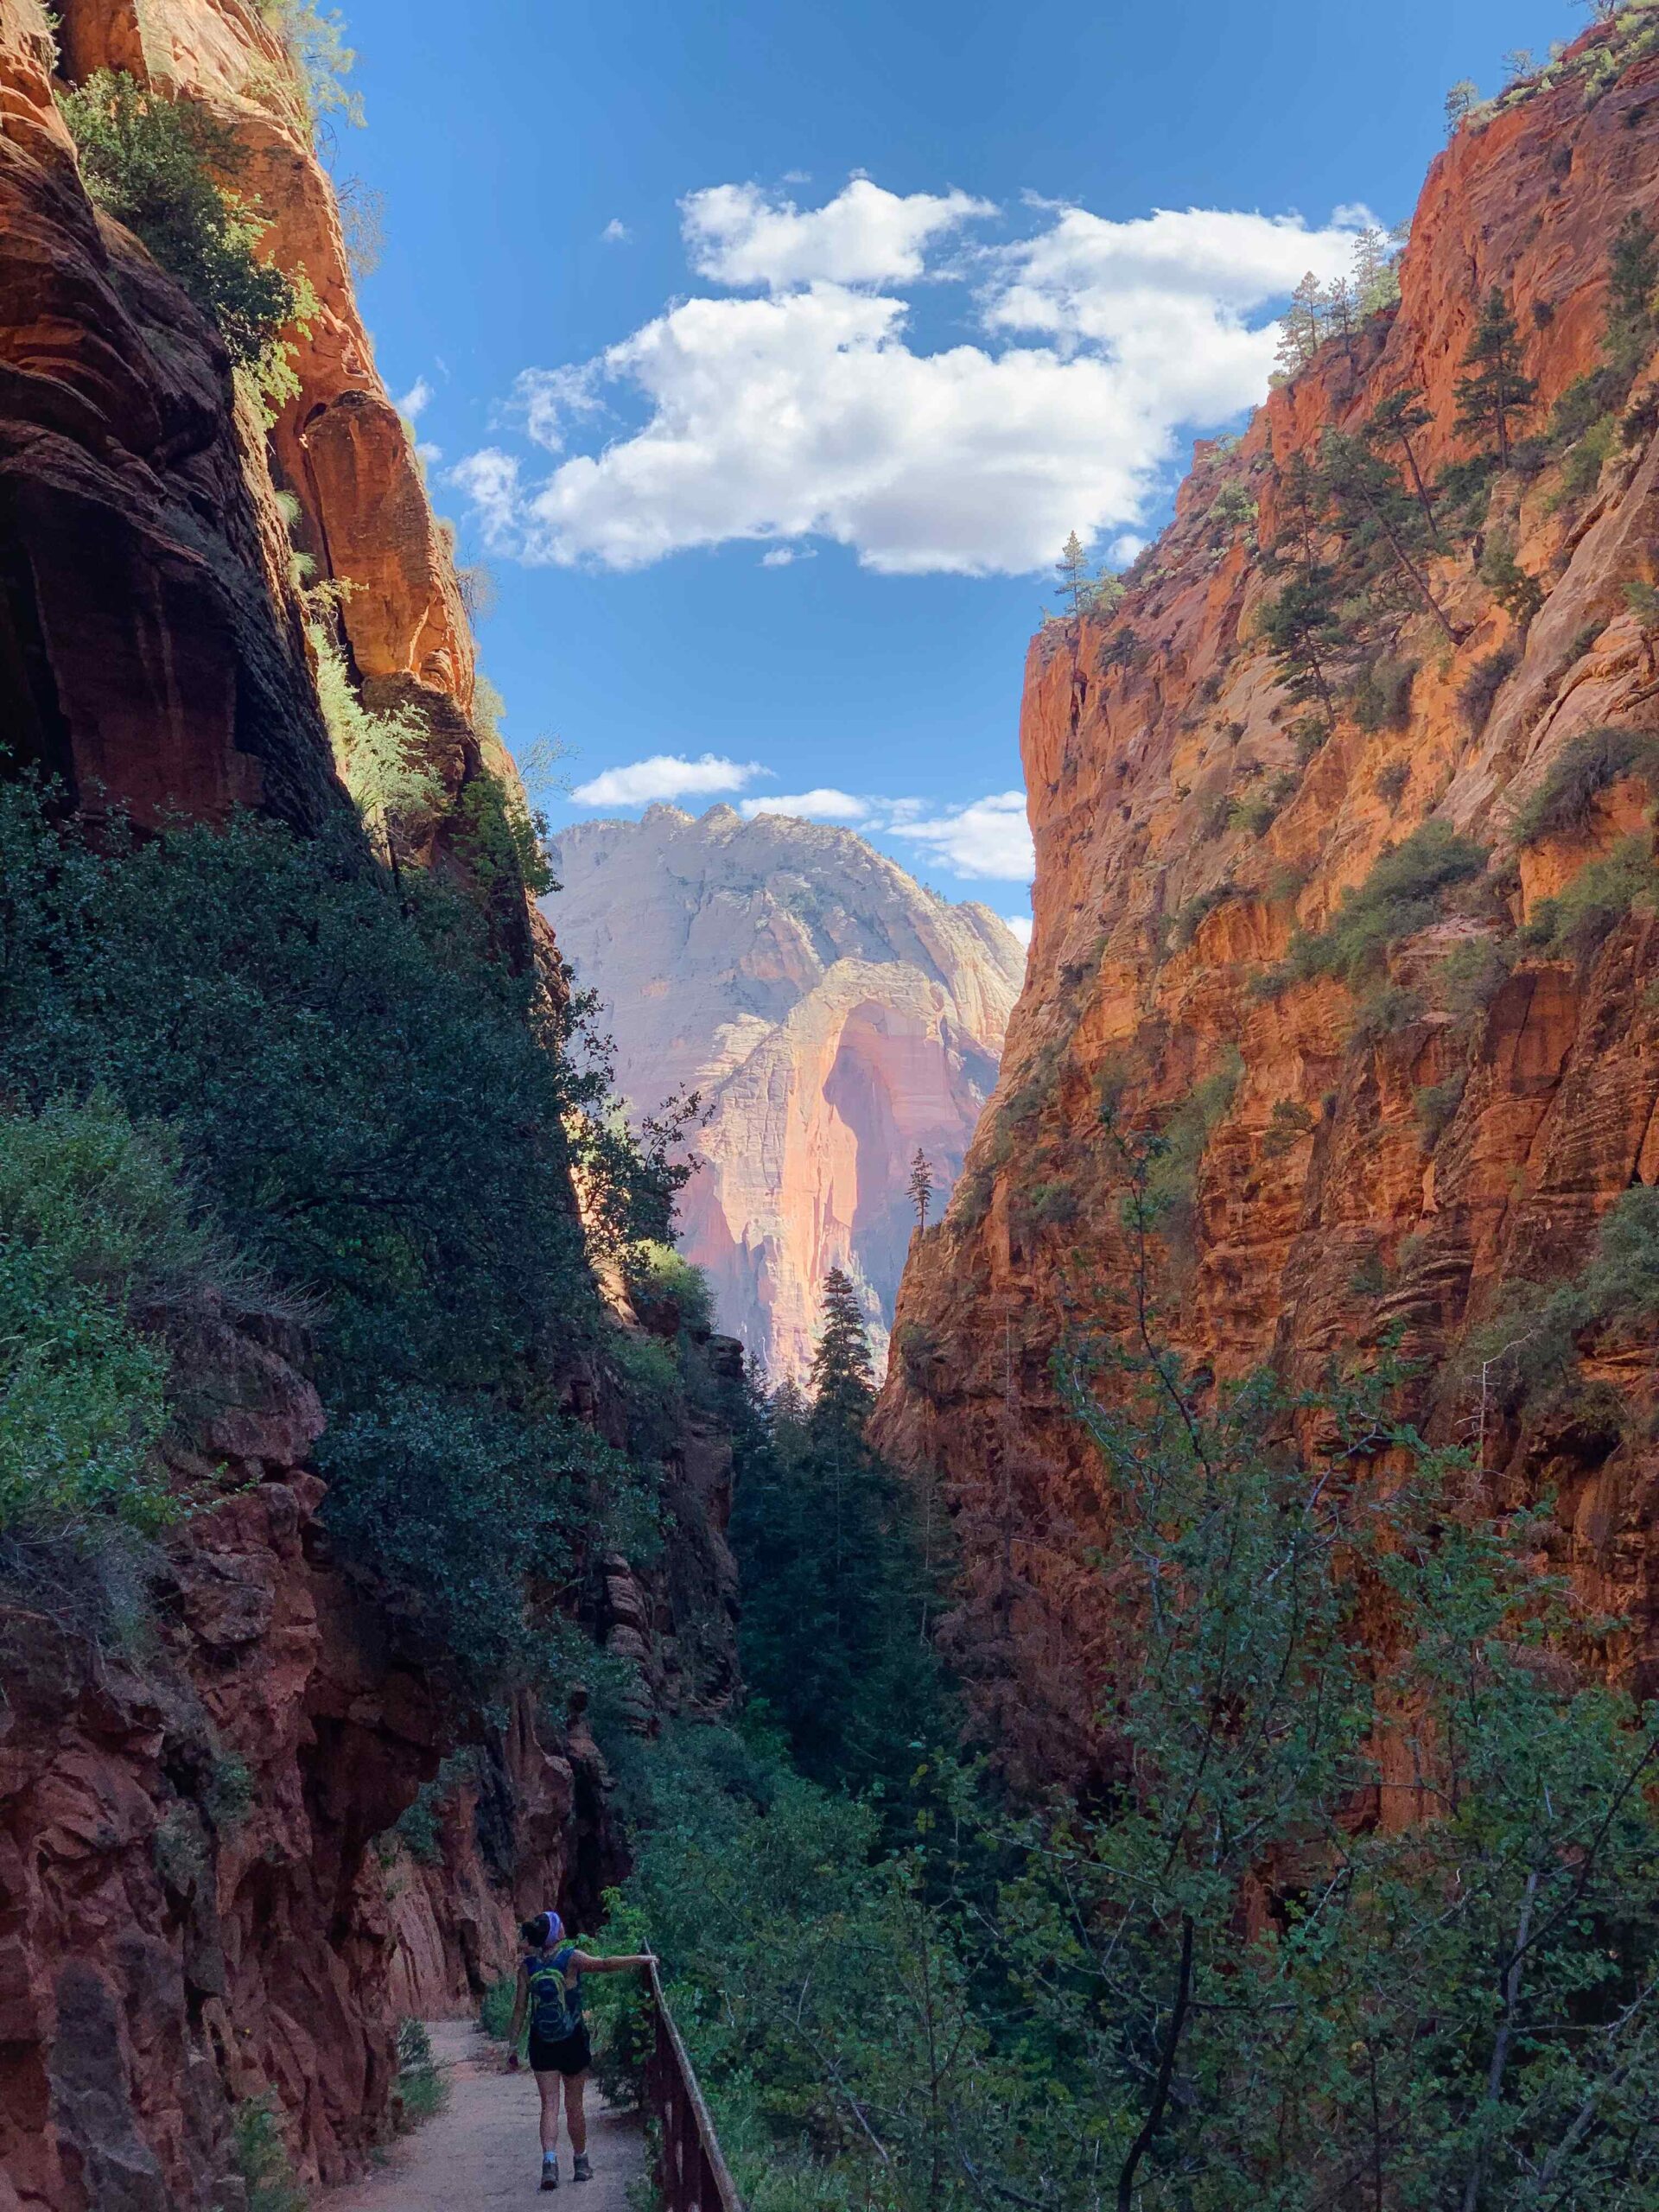
2. Refrigerator Canyon
Did I mention shade?
The hike veers into the rocks and once you enter refrigerator canyon, you’ll know it right away. The cool breeze and shade were a very welcomed break from the heat. This portion of the hike was less steep, and a nice break from the sunny switchbacks.
This portion of the hike on the return trip down was actually some of my favorite parts! The view on the way in was great too. But for some reason, on the way out I realized how epically huge and beautiful the rock was on this part of the hike.
3. Walter’s Wiggles
About 1.8 miles into the hike, you’ll arrive at the infamous Walter’s Wiggles!
This section includes 21 steep switchbacks that make your legs burn. It doesn’t take long to accomplish this section of the hike, but it might be the more strenuous part because of the continuous incline.
I couldn’t help but think about how difficult it was to construct Walters Wiggles. I mean, it’s a super remote location on a very steep incline, chiseling into tough rock to create what appear to be very symmetrical switchbacks.
I looked it up later and found out that it took 258 helicopter flights hauling 88 cubic yards of concrete to make it happen. So take a moment to appreciate the masterpieces that was created so you could more easily make your way up to Angels Landing.
4. Scout’s Lookout
After you tackle Walter’s Wiggles, just over 2 miles into the hike, the path opens up to a flat, open area. Here is where you can find the flat sandstone slab that is Scout’s Lookout. The Scout Lookout elevation is about 1,100 ft, so most of the steep climb is already over.
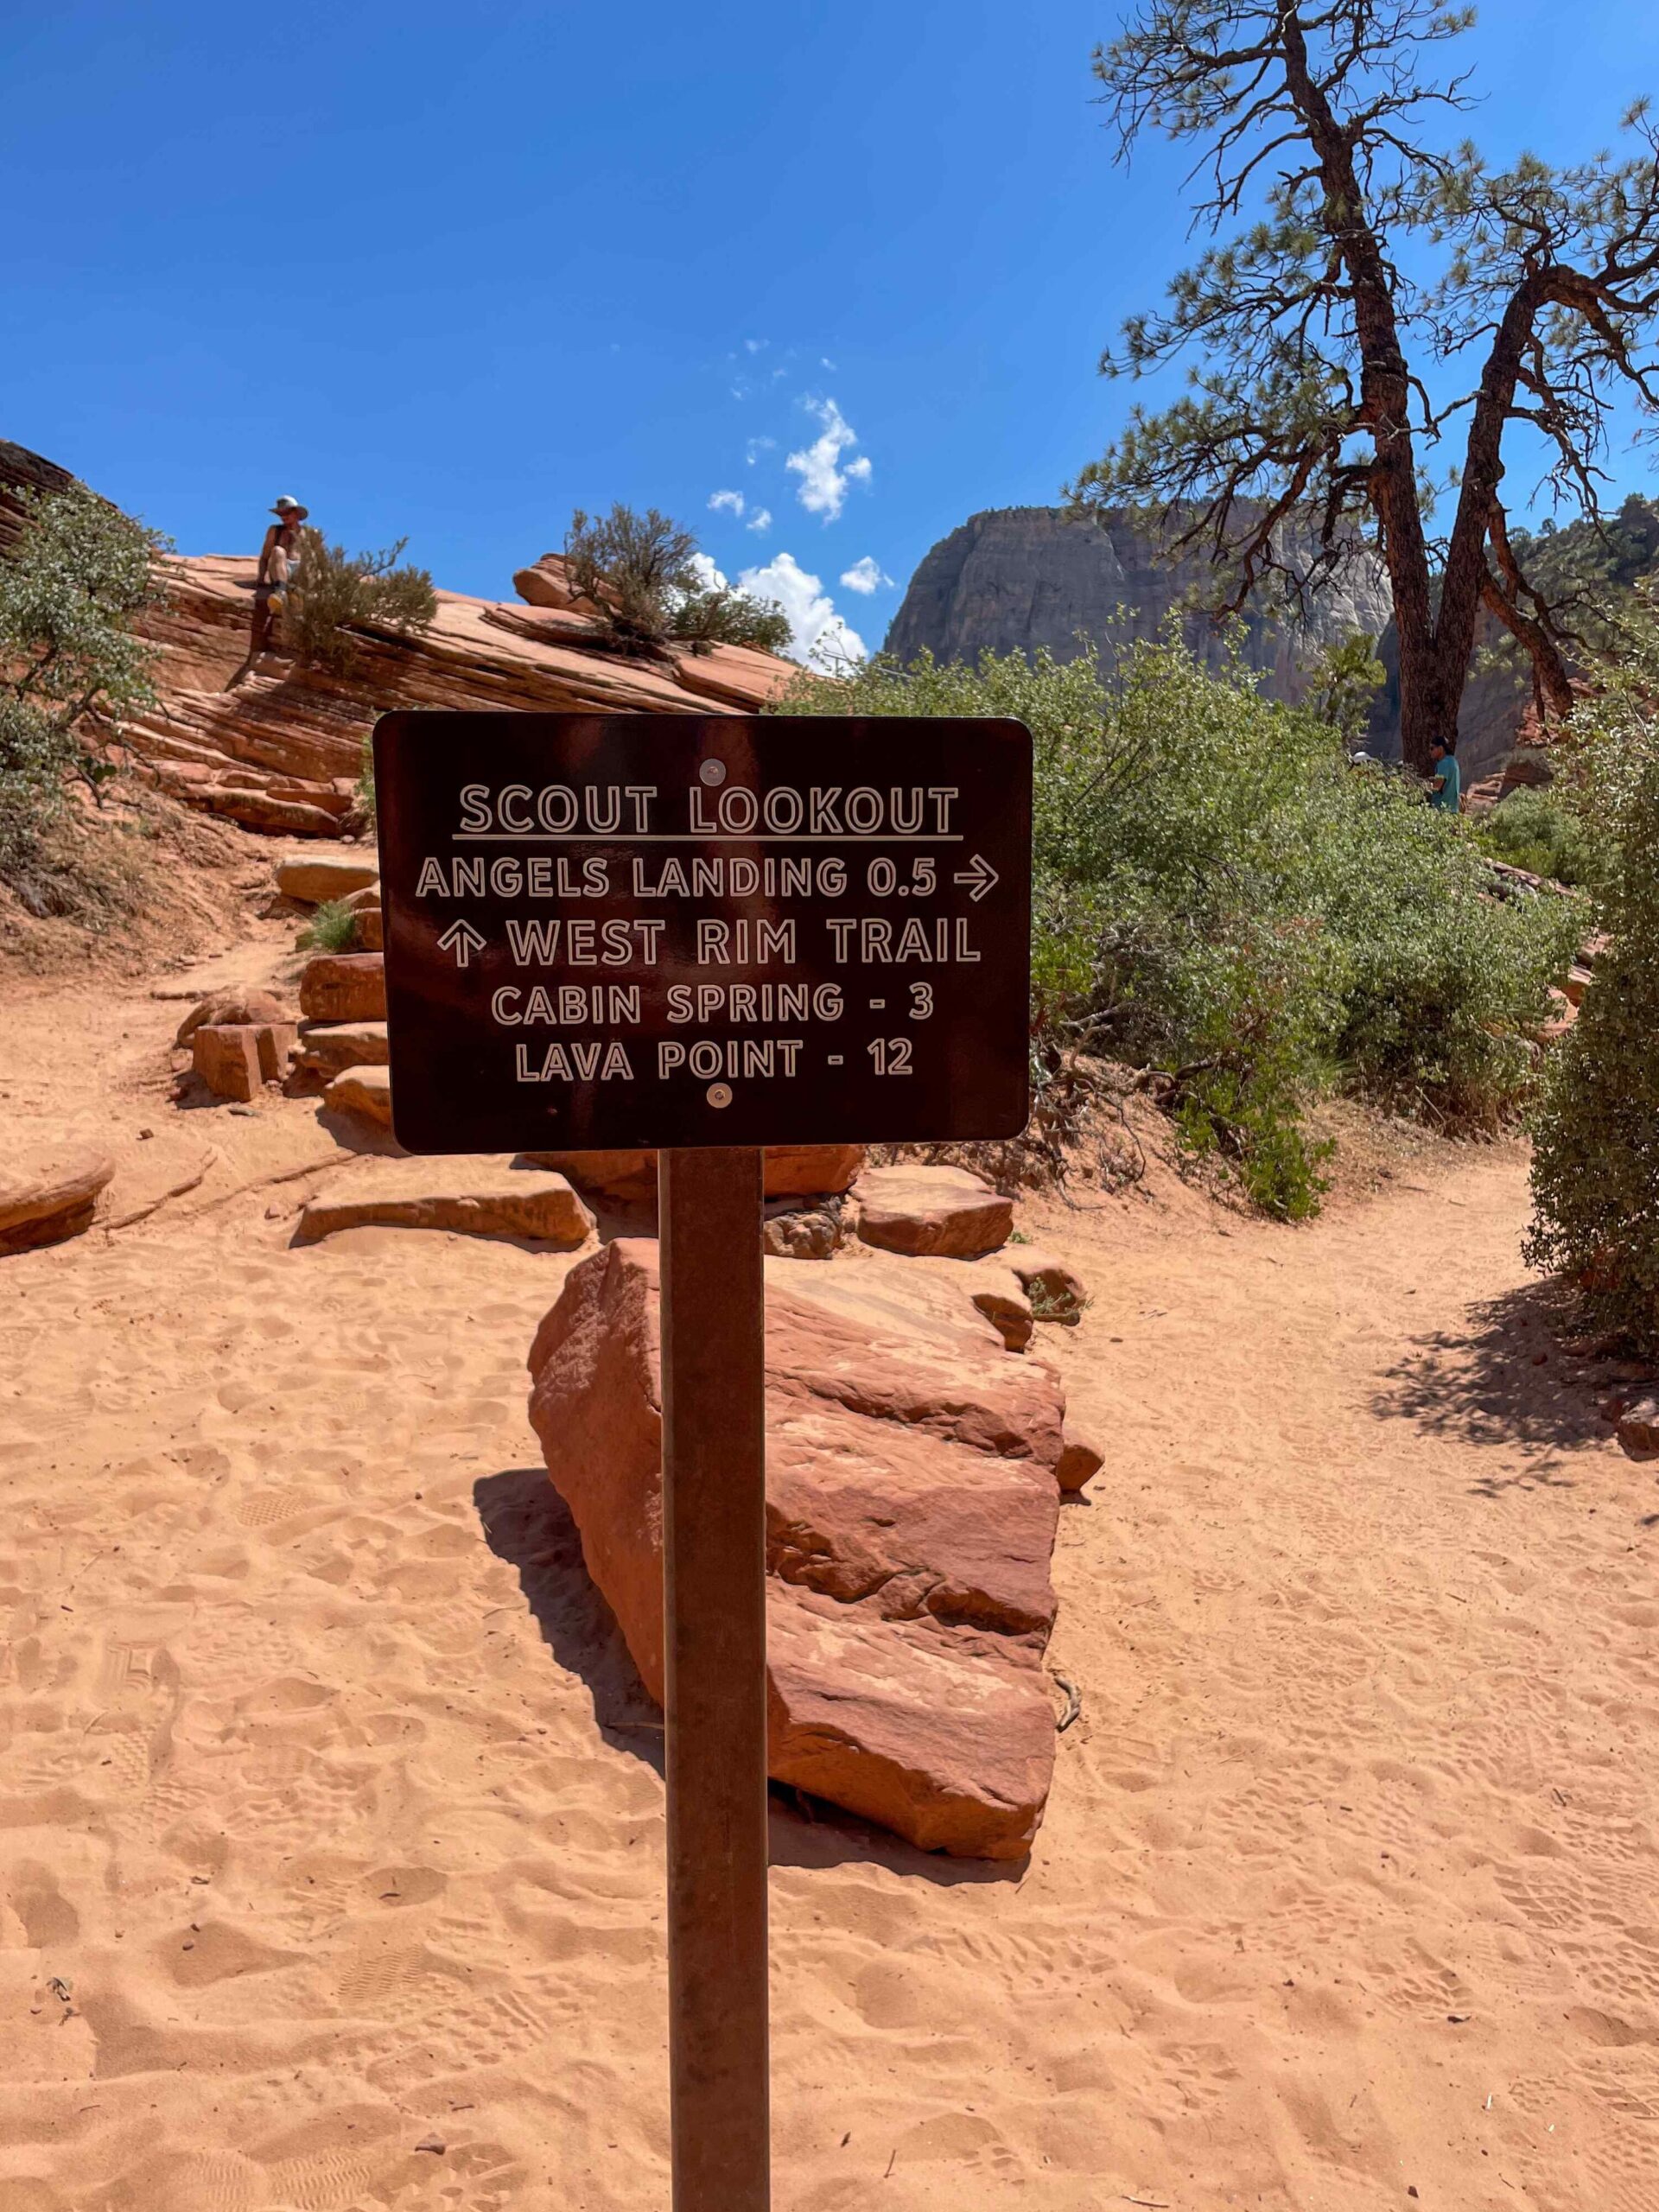
Some hikers, especially those afraid of heights or without permits, choose to hike up to Scouts Lookout as their final destination. This is a great option is someone in your party is really afraid of heights or not willing to do the ridge. You can easily hang back at Scout’s Lookout with a great view and wait for others to complete the rest of the trail.
To the right, you’ll see the ridge leading out to Angels Landing. There is a restroom in this area and it’s a good place to rest and eat a snack before the final stretch.
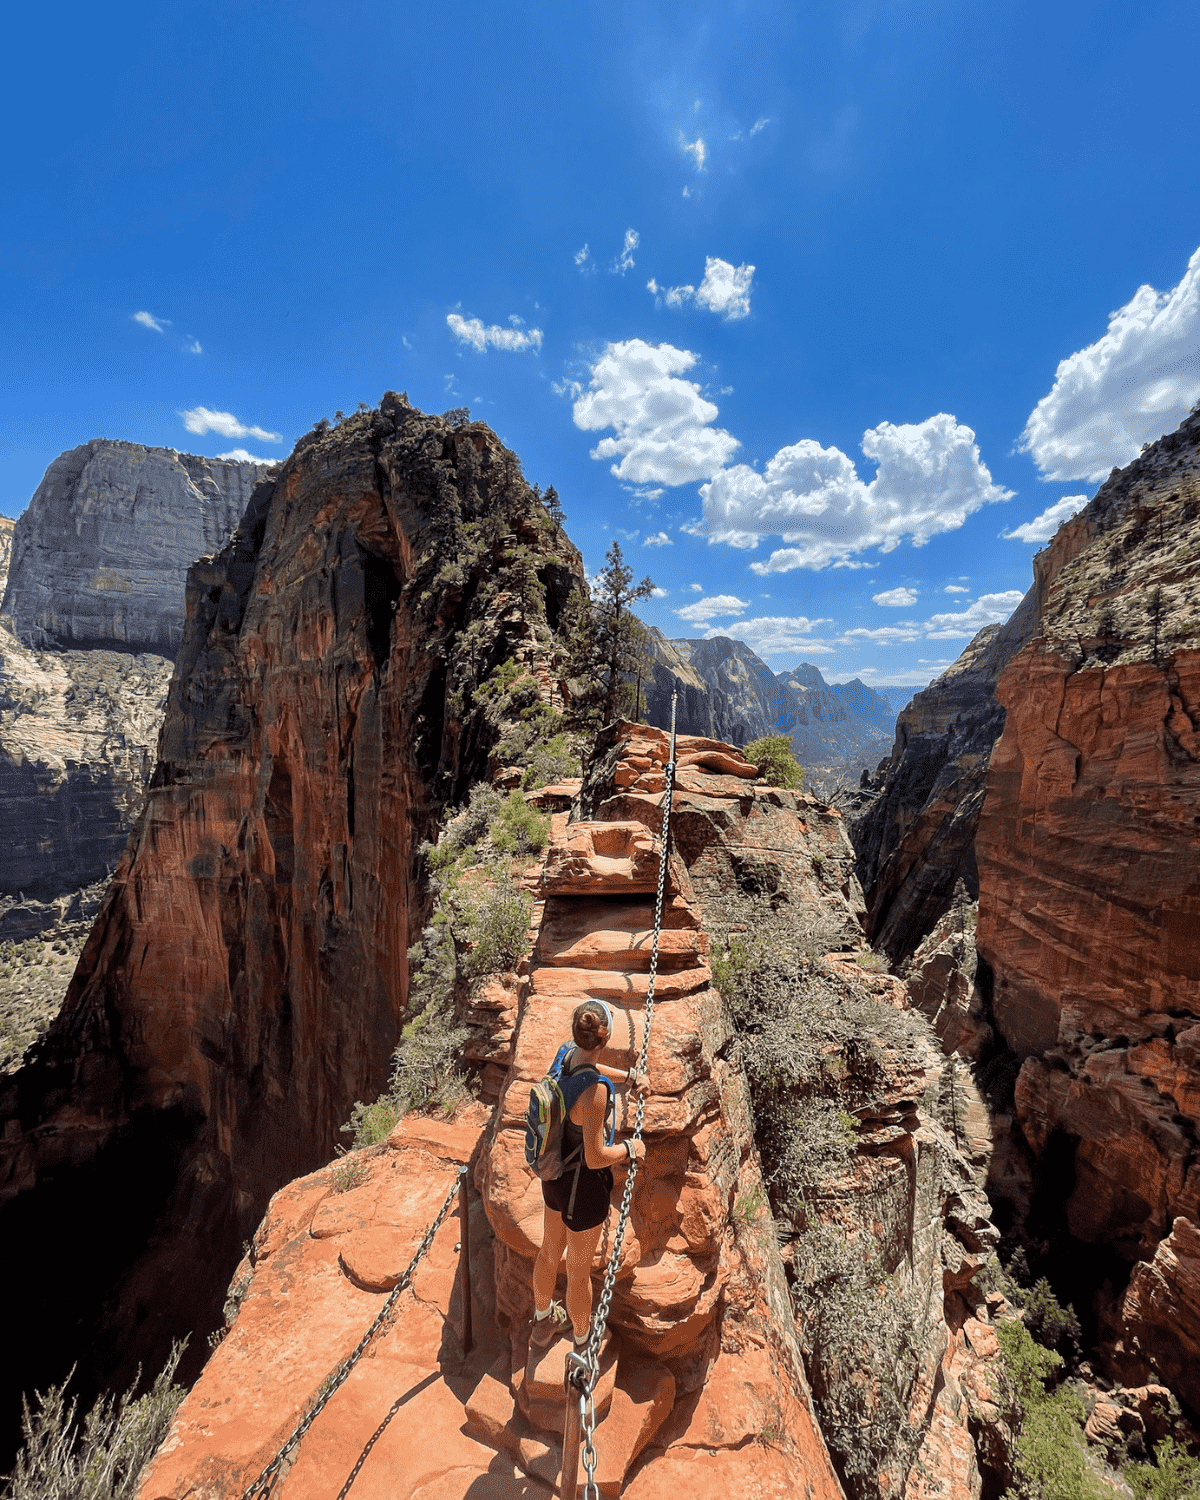
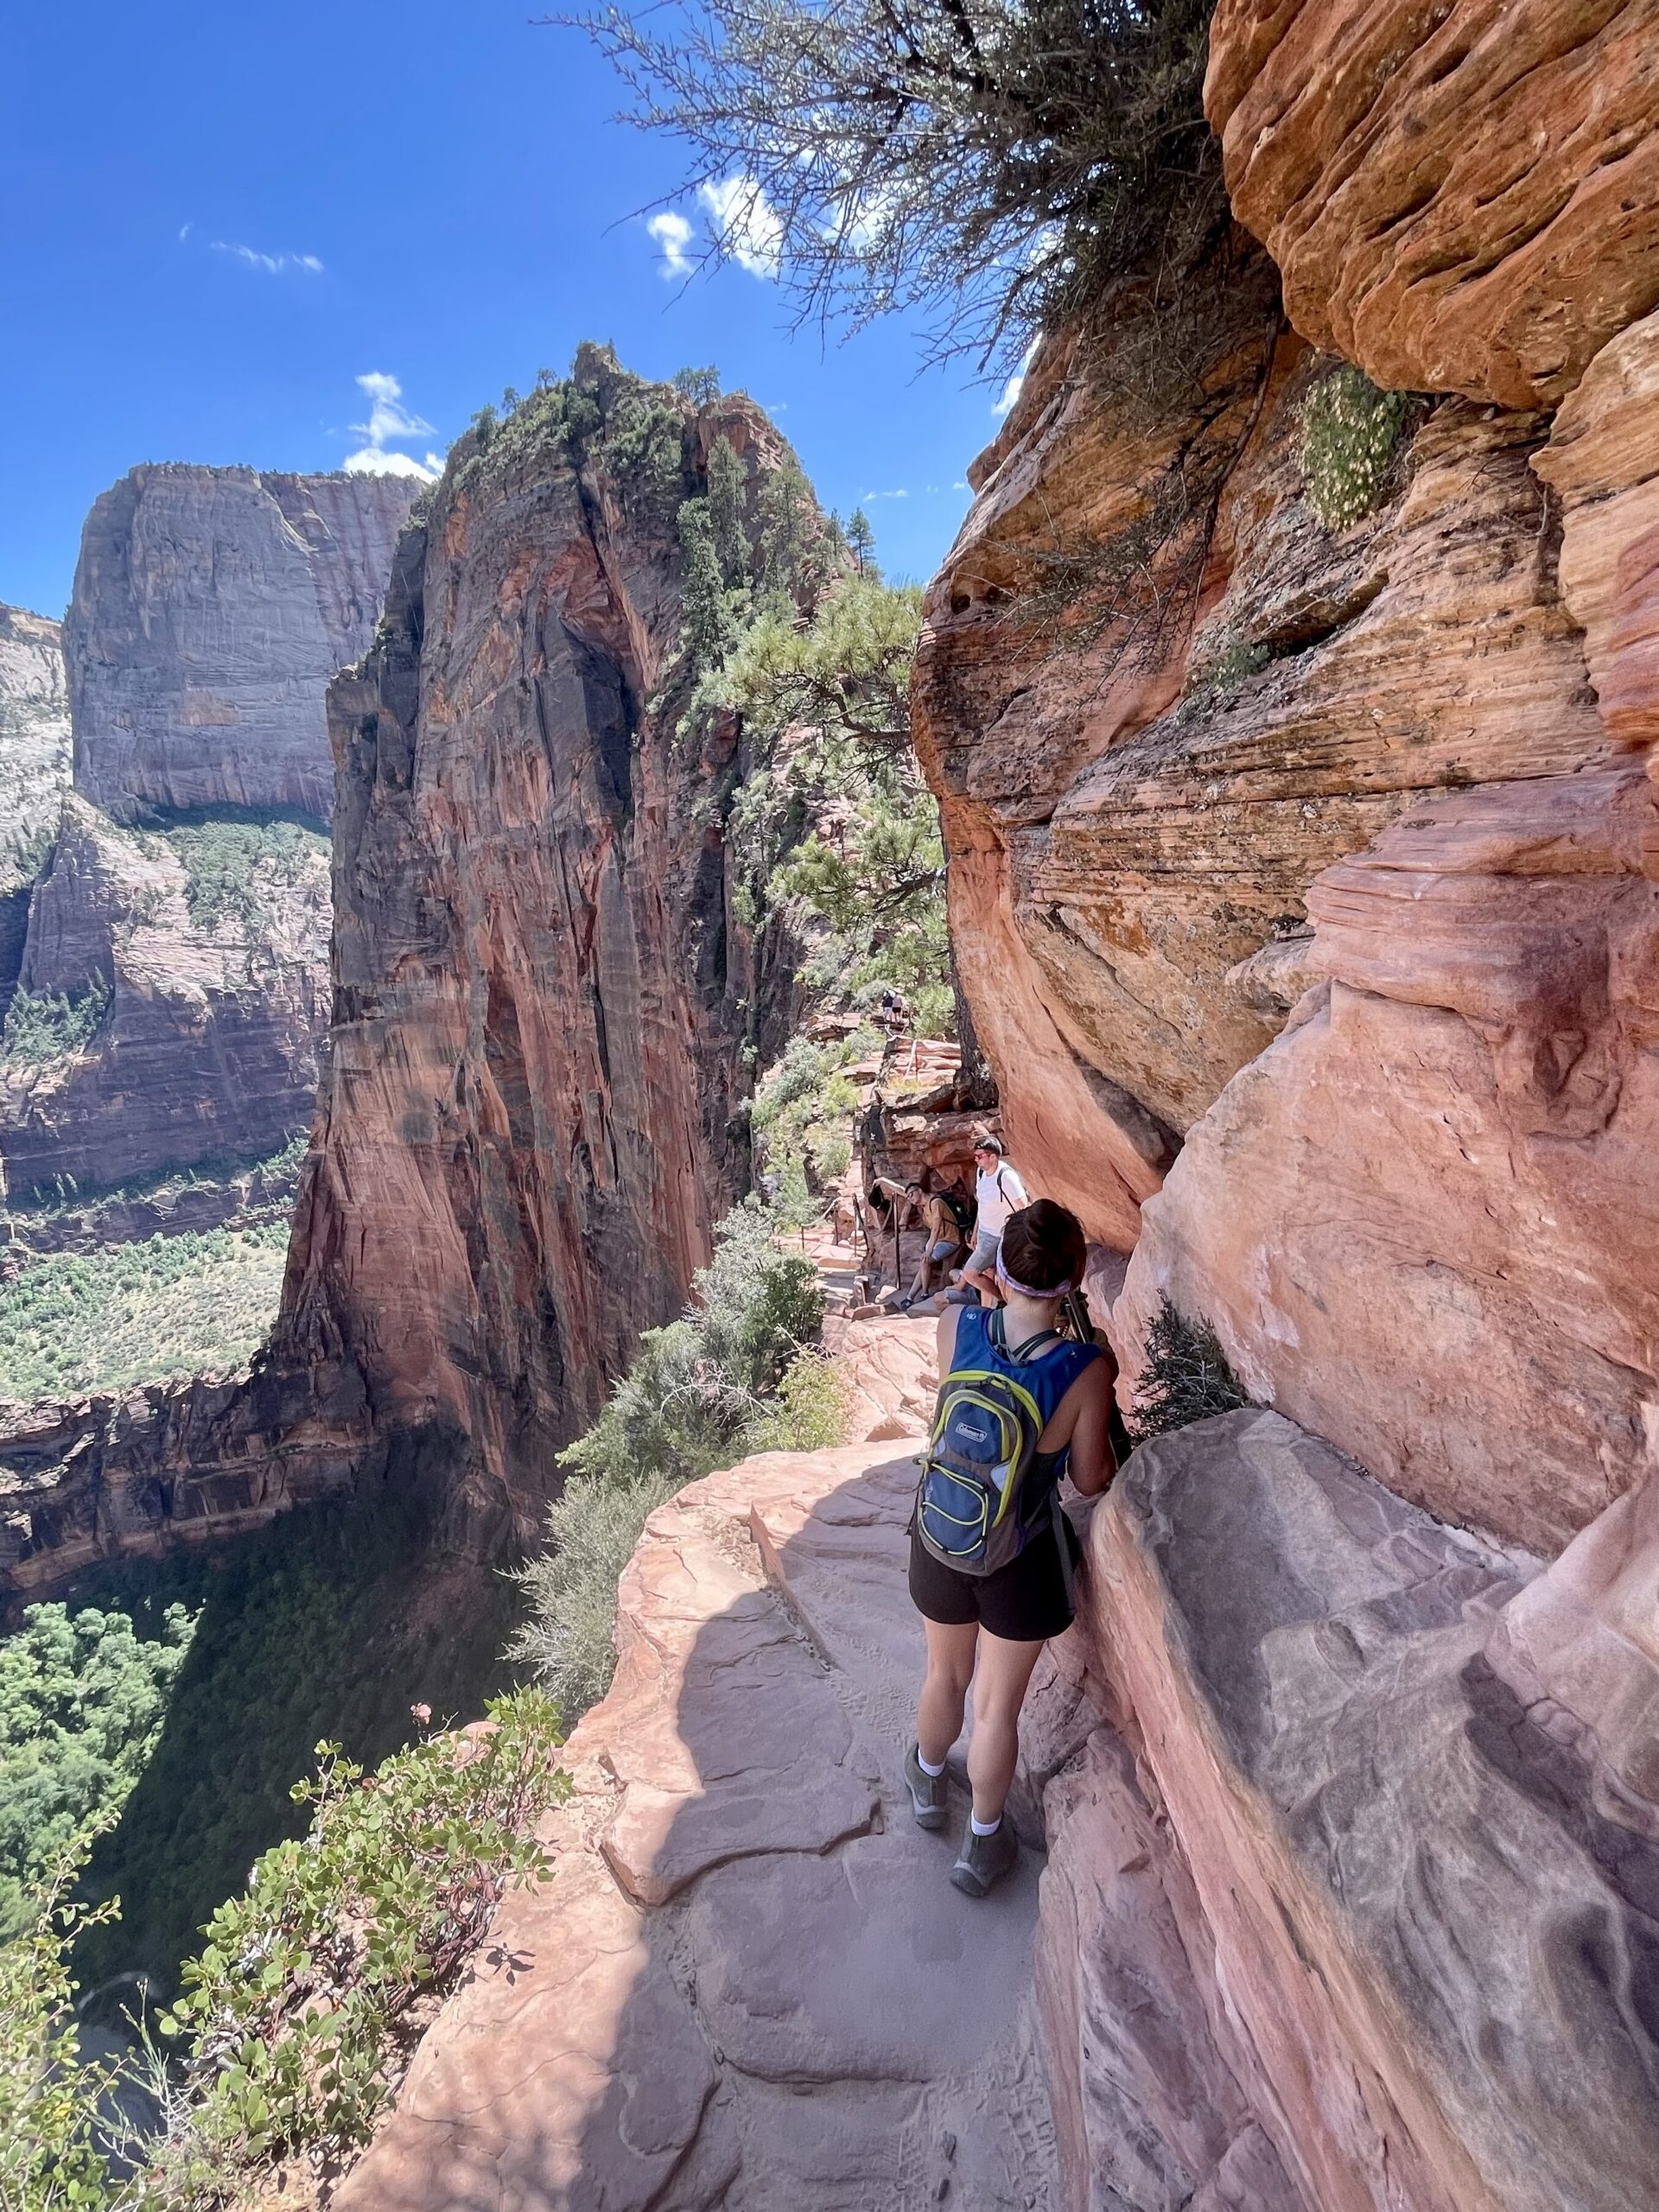
5. Ridge to Angels Landing
As you make your way toward the ridge, you’ll see the rangers parked at the base checking for permits. This is where your hike will end if you don’t have the permits to cross the ridge to Angeles Landing.
We pulled out our phones and showed the permit and ID and we were on our way quickly. There were a couple of guys there begging the rangers to let them cross without a permit, but they were not successful. I felt bad for them. Don’t expect to sneak past the check point! The rangers aren’t messing around and they are strict on allowing only permitted hikers to cross to protect everyone’s safety.
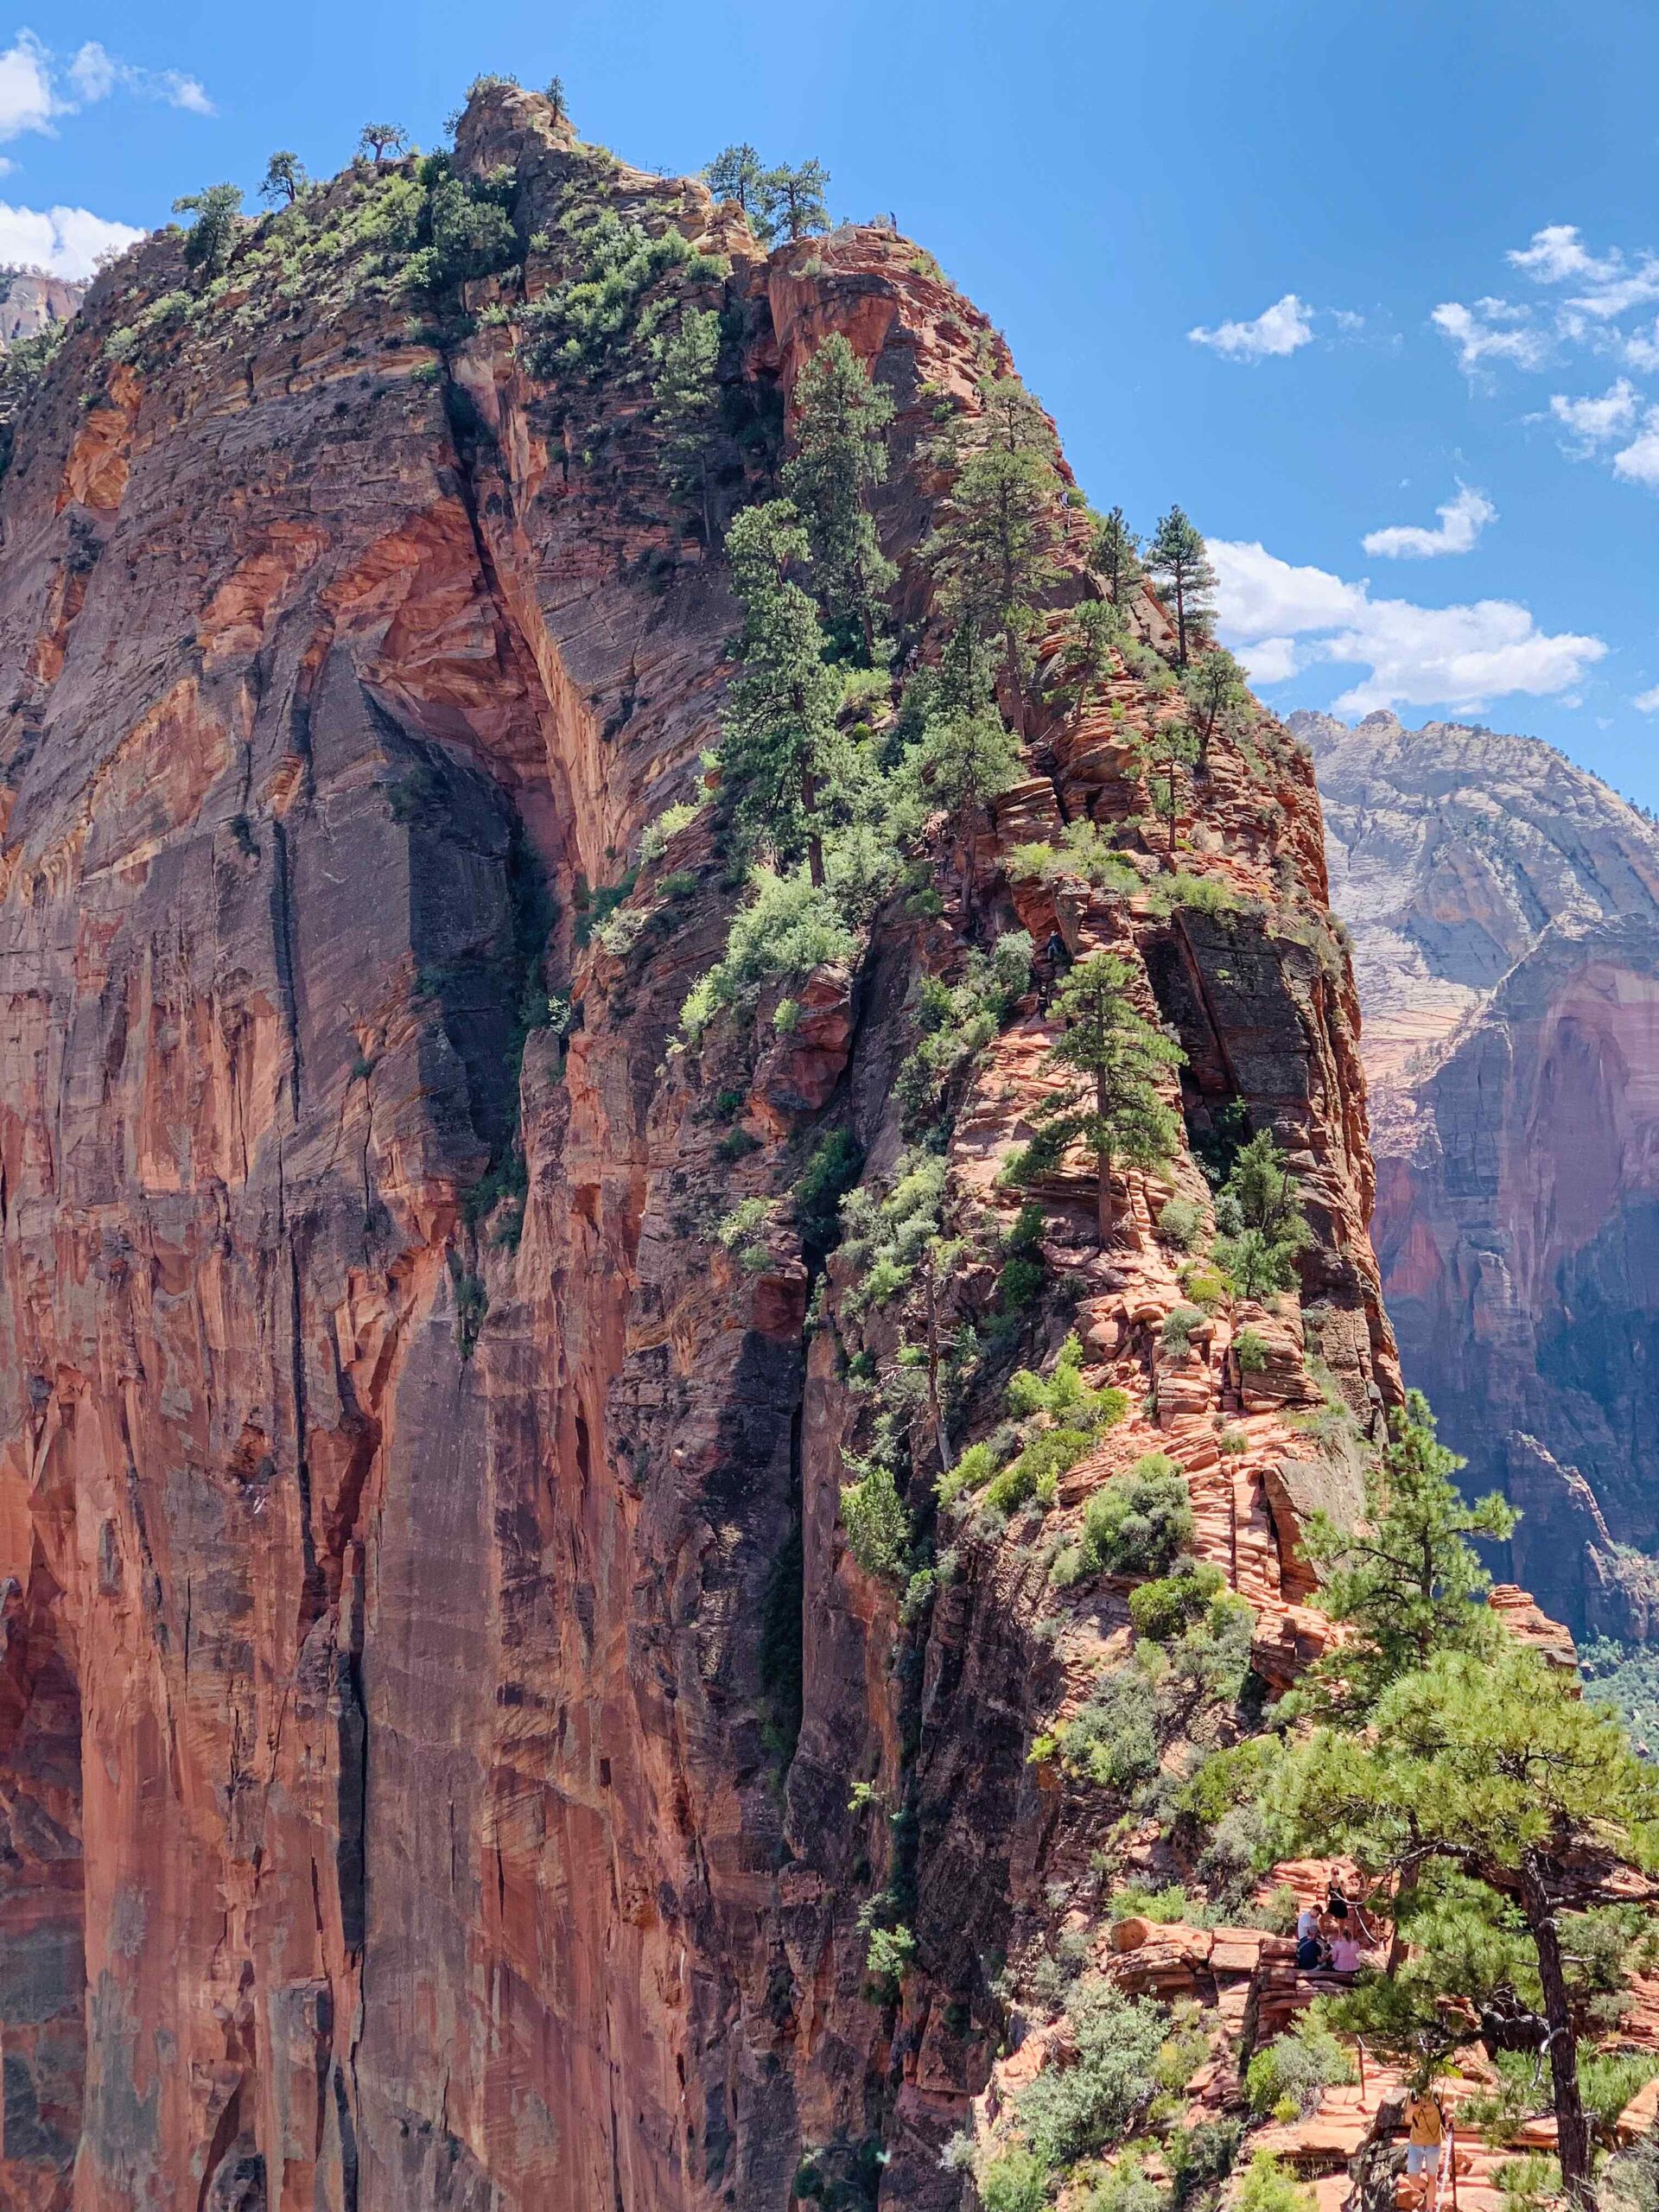
How Scary is Angels Landing?
Up until this point, I didn’t realize how steep it was on BOTH sides of the ridge. I expected a drop off and a steep section. And honestly I don’t really know what I was expecting. But DANG… on BOTH sides?!
I never really feel like I was actually close to falling. So no, it wasn’t all that scary because the chains provide you with good stability. But it was scary enough that I wanted to make sure I was sure footed at every step haha. In some sections, there isn’t much room for error or slipping.
I had the same mentality I had while hiking Half Dome. I decided to take it one step at a time, one chain segment at a time. That focus on each section rather than the steep drops made it less scary. And focusing on how great the view will be at the top also helps! And it definitely was.
Of course, it’s naturally scary to see those steep drops. But I try to focus on how thankful I am to have the opportunity to experience it with safety measures like the paved switchbacks, chains and rangers around to check conditions. We are so blessed!
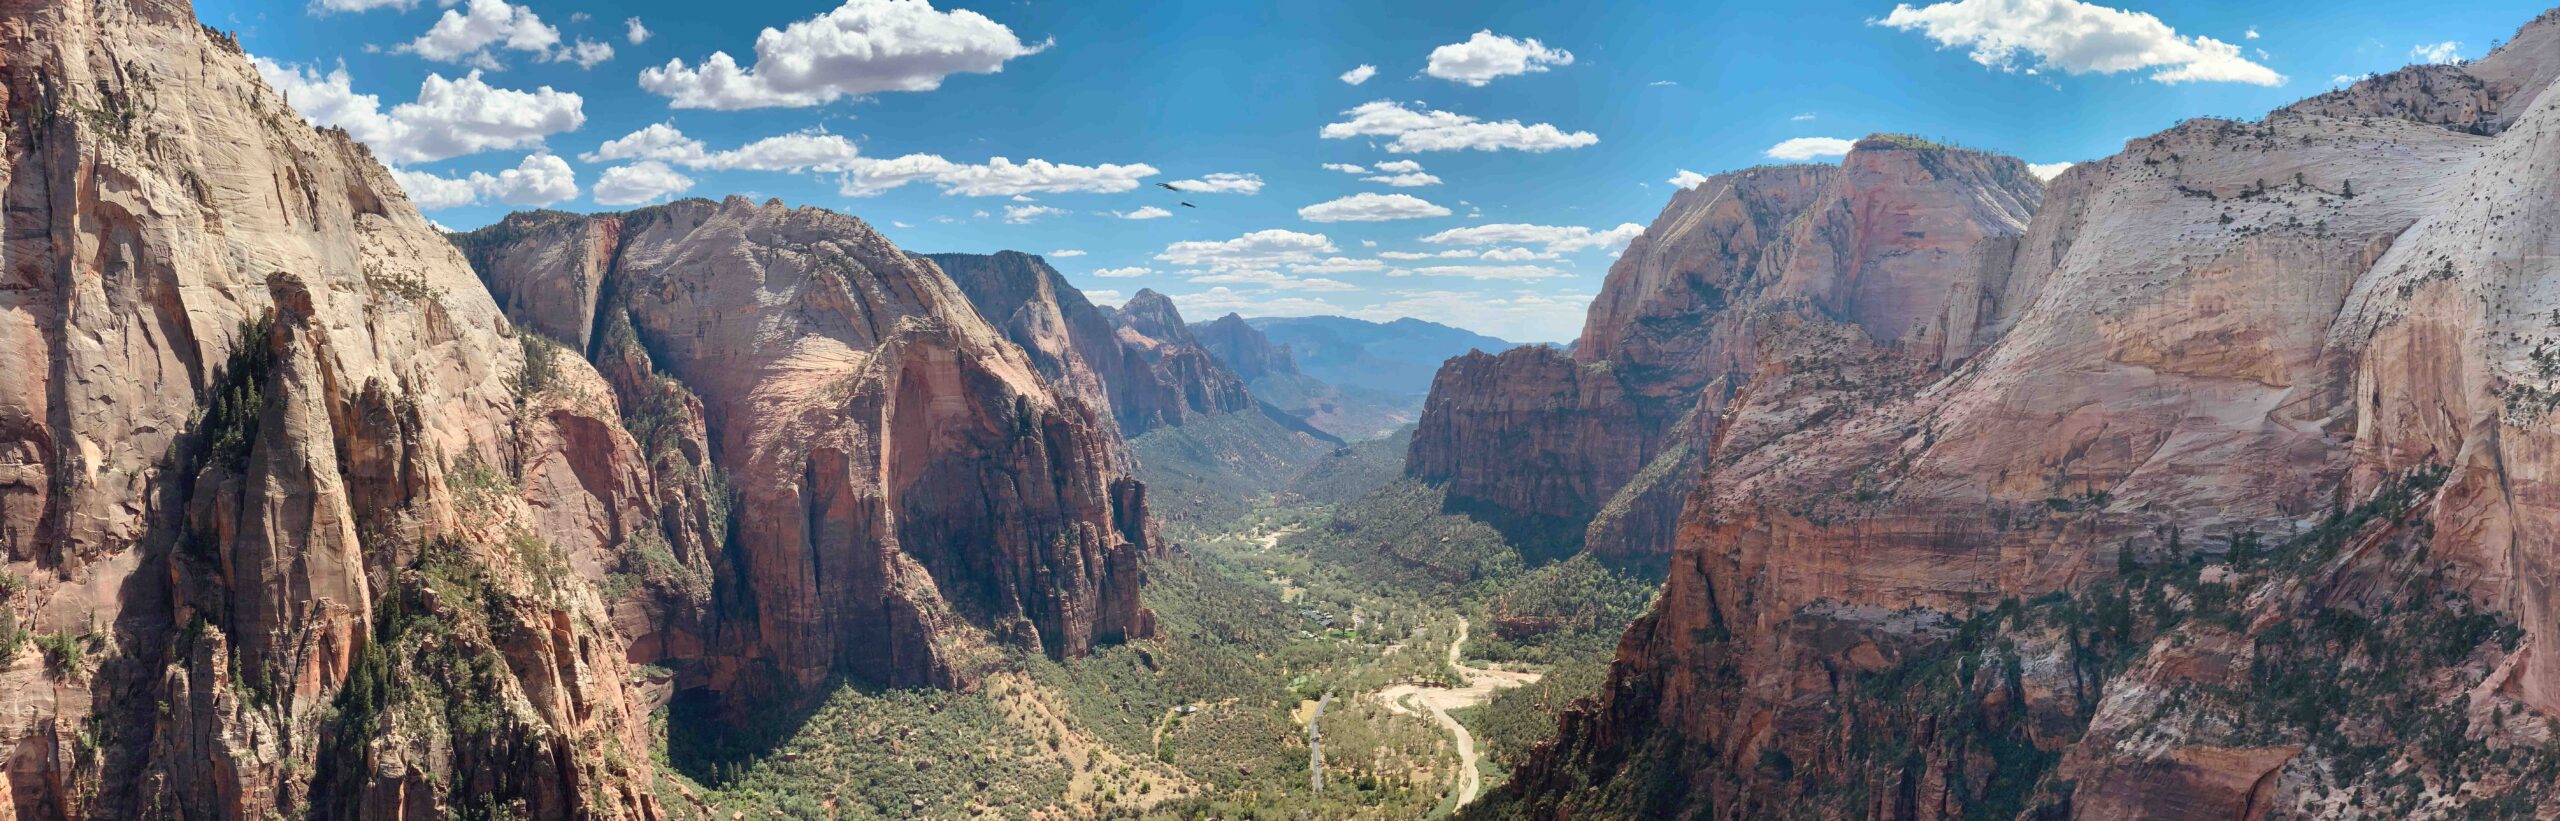
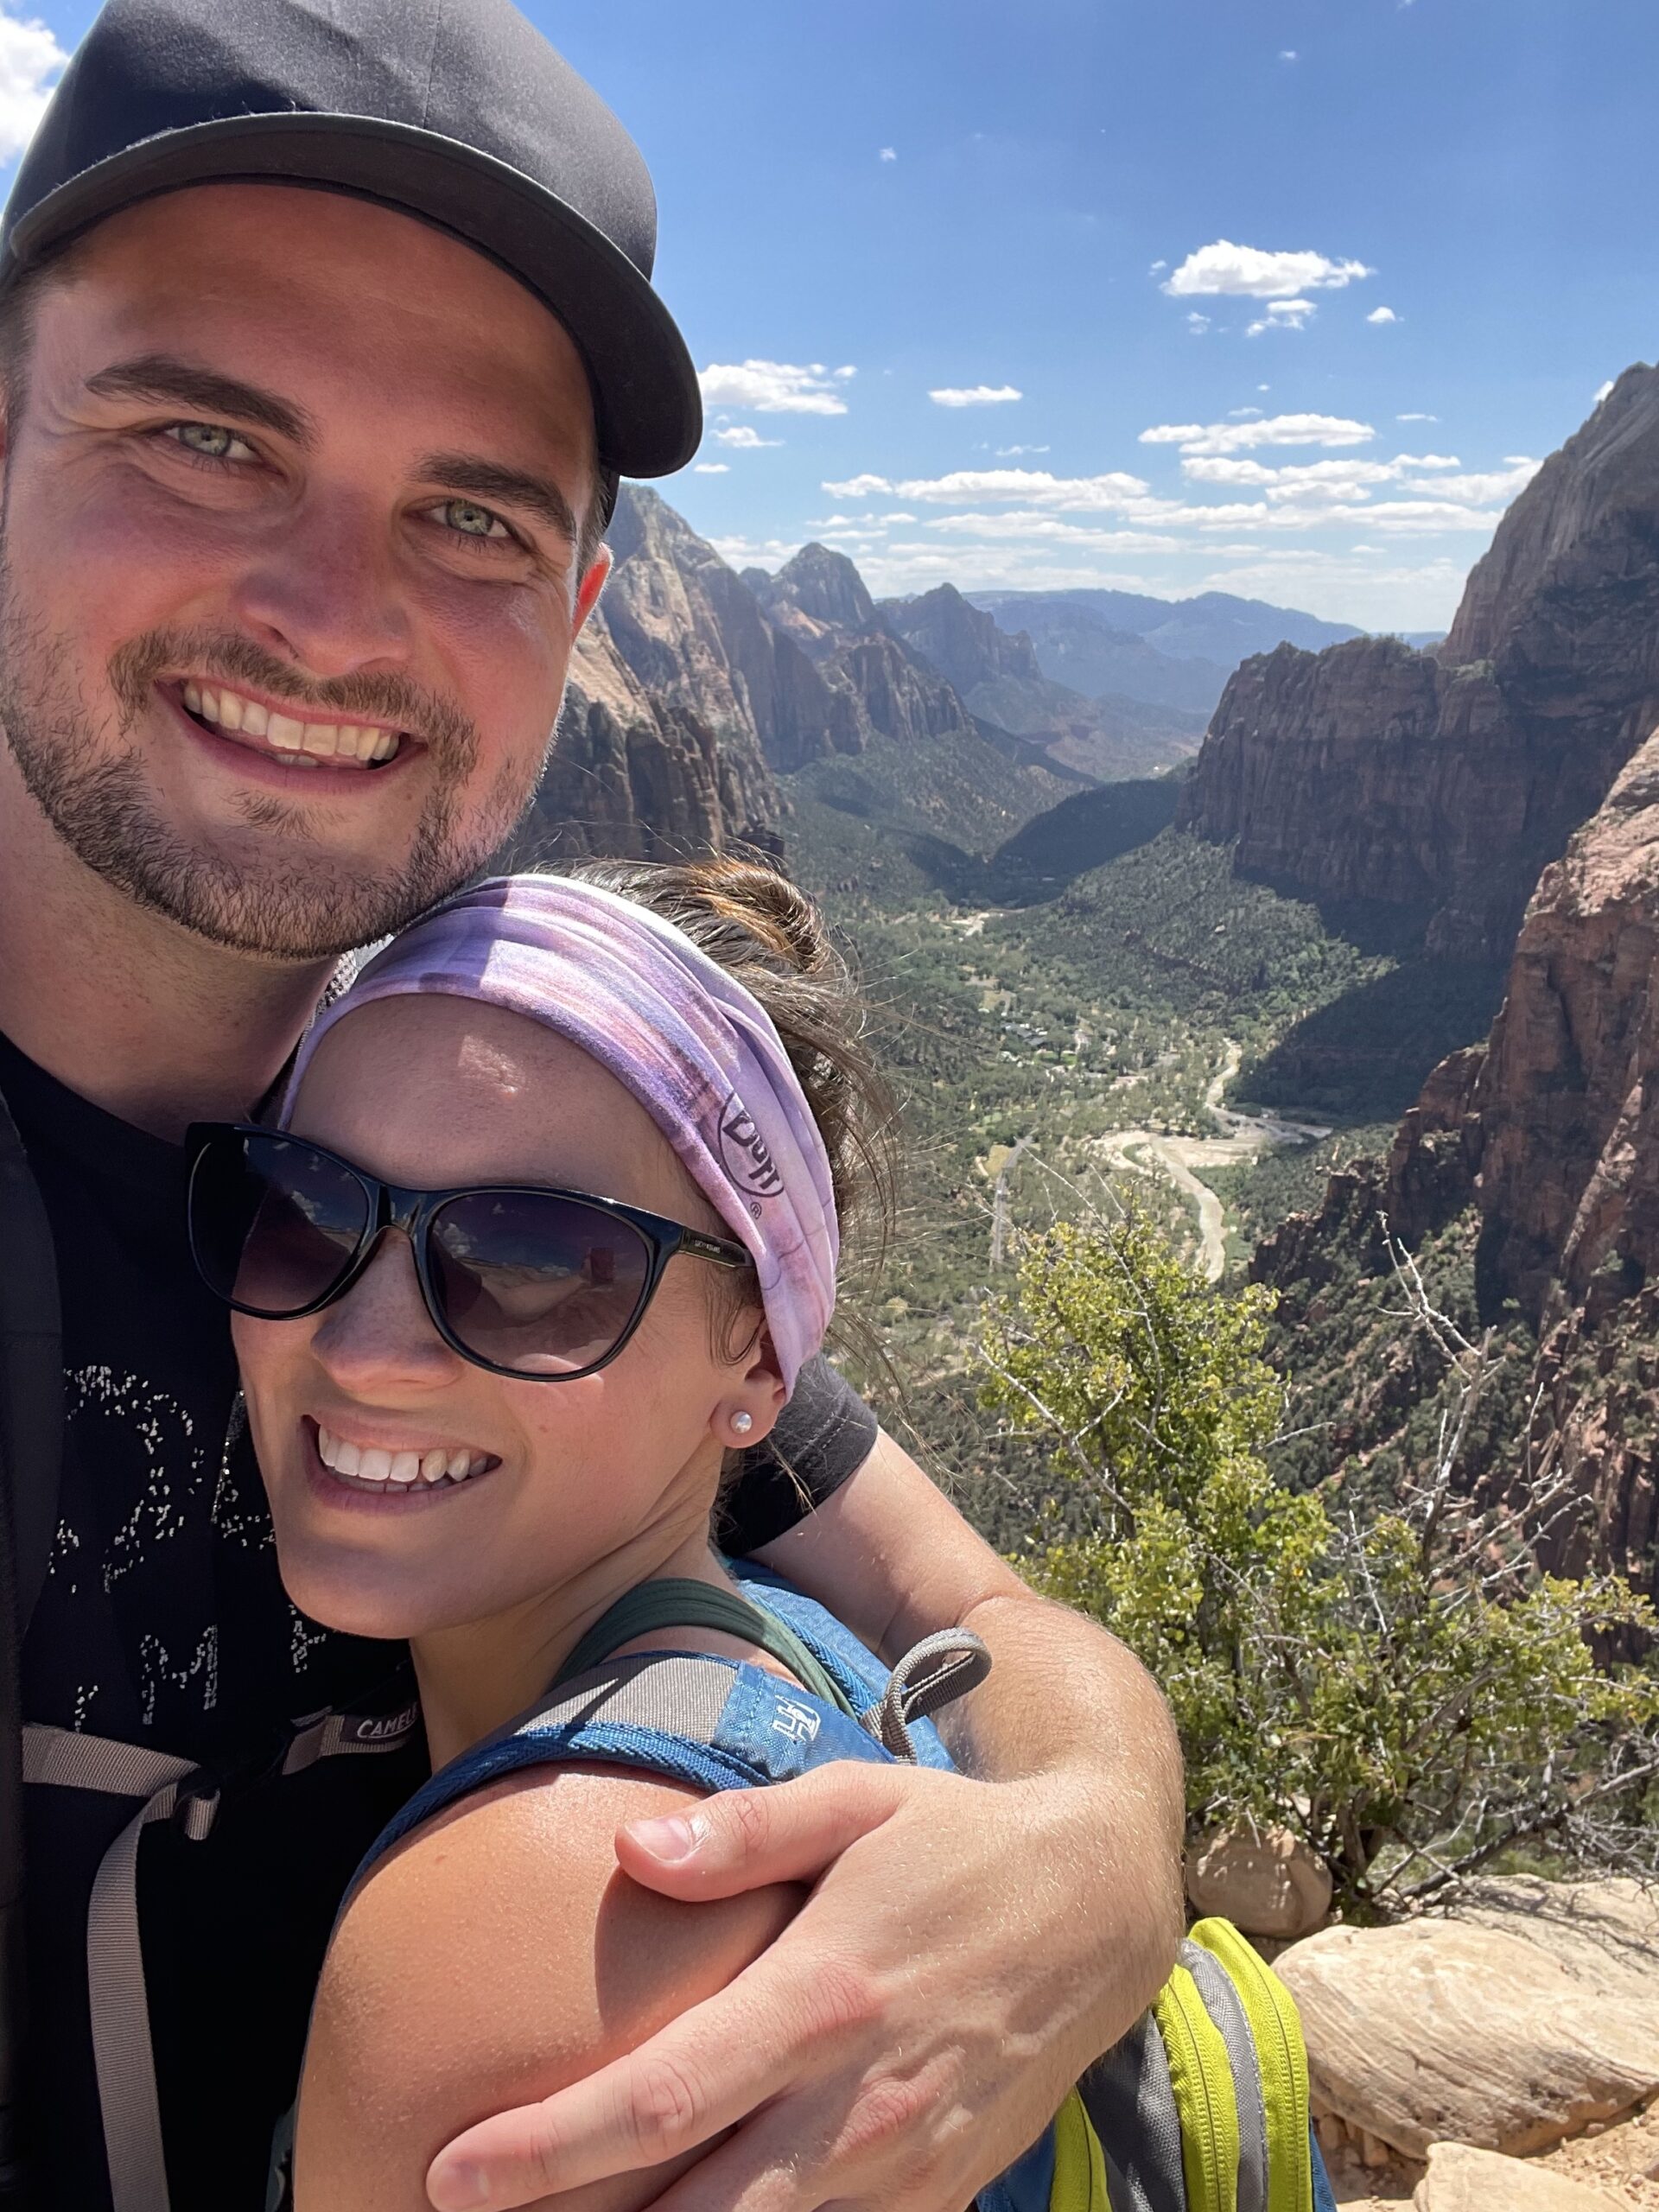
6. Angels Landing
Arriving at the edge felt incredible! The view is just insane.
It still blows my mind that this little sliver of the world is even possible to visit, and just a few hours of hiking away. Looking out over the canyon gave me so much peace and gratitude for what God’s created. An amazing feeling I hope everyone can experience, and a highlight of the trip.
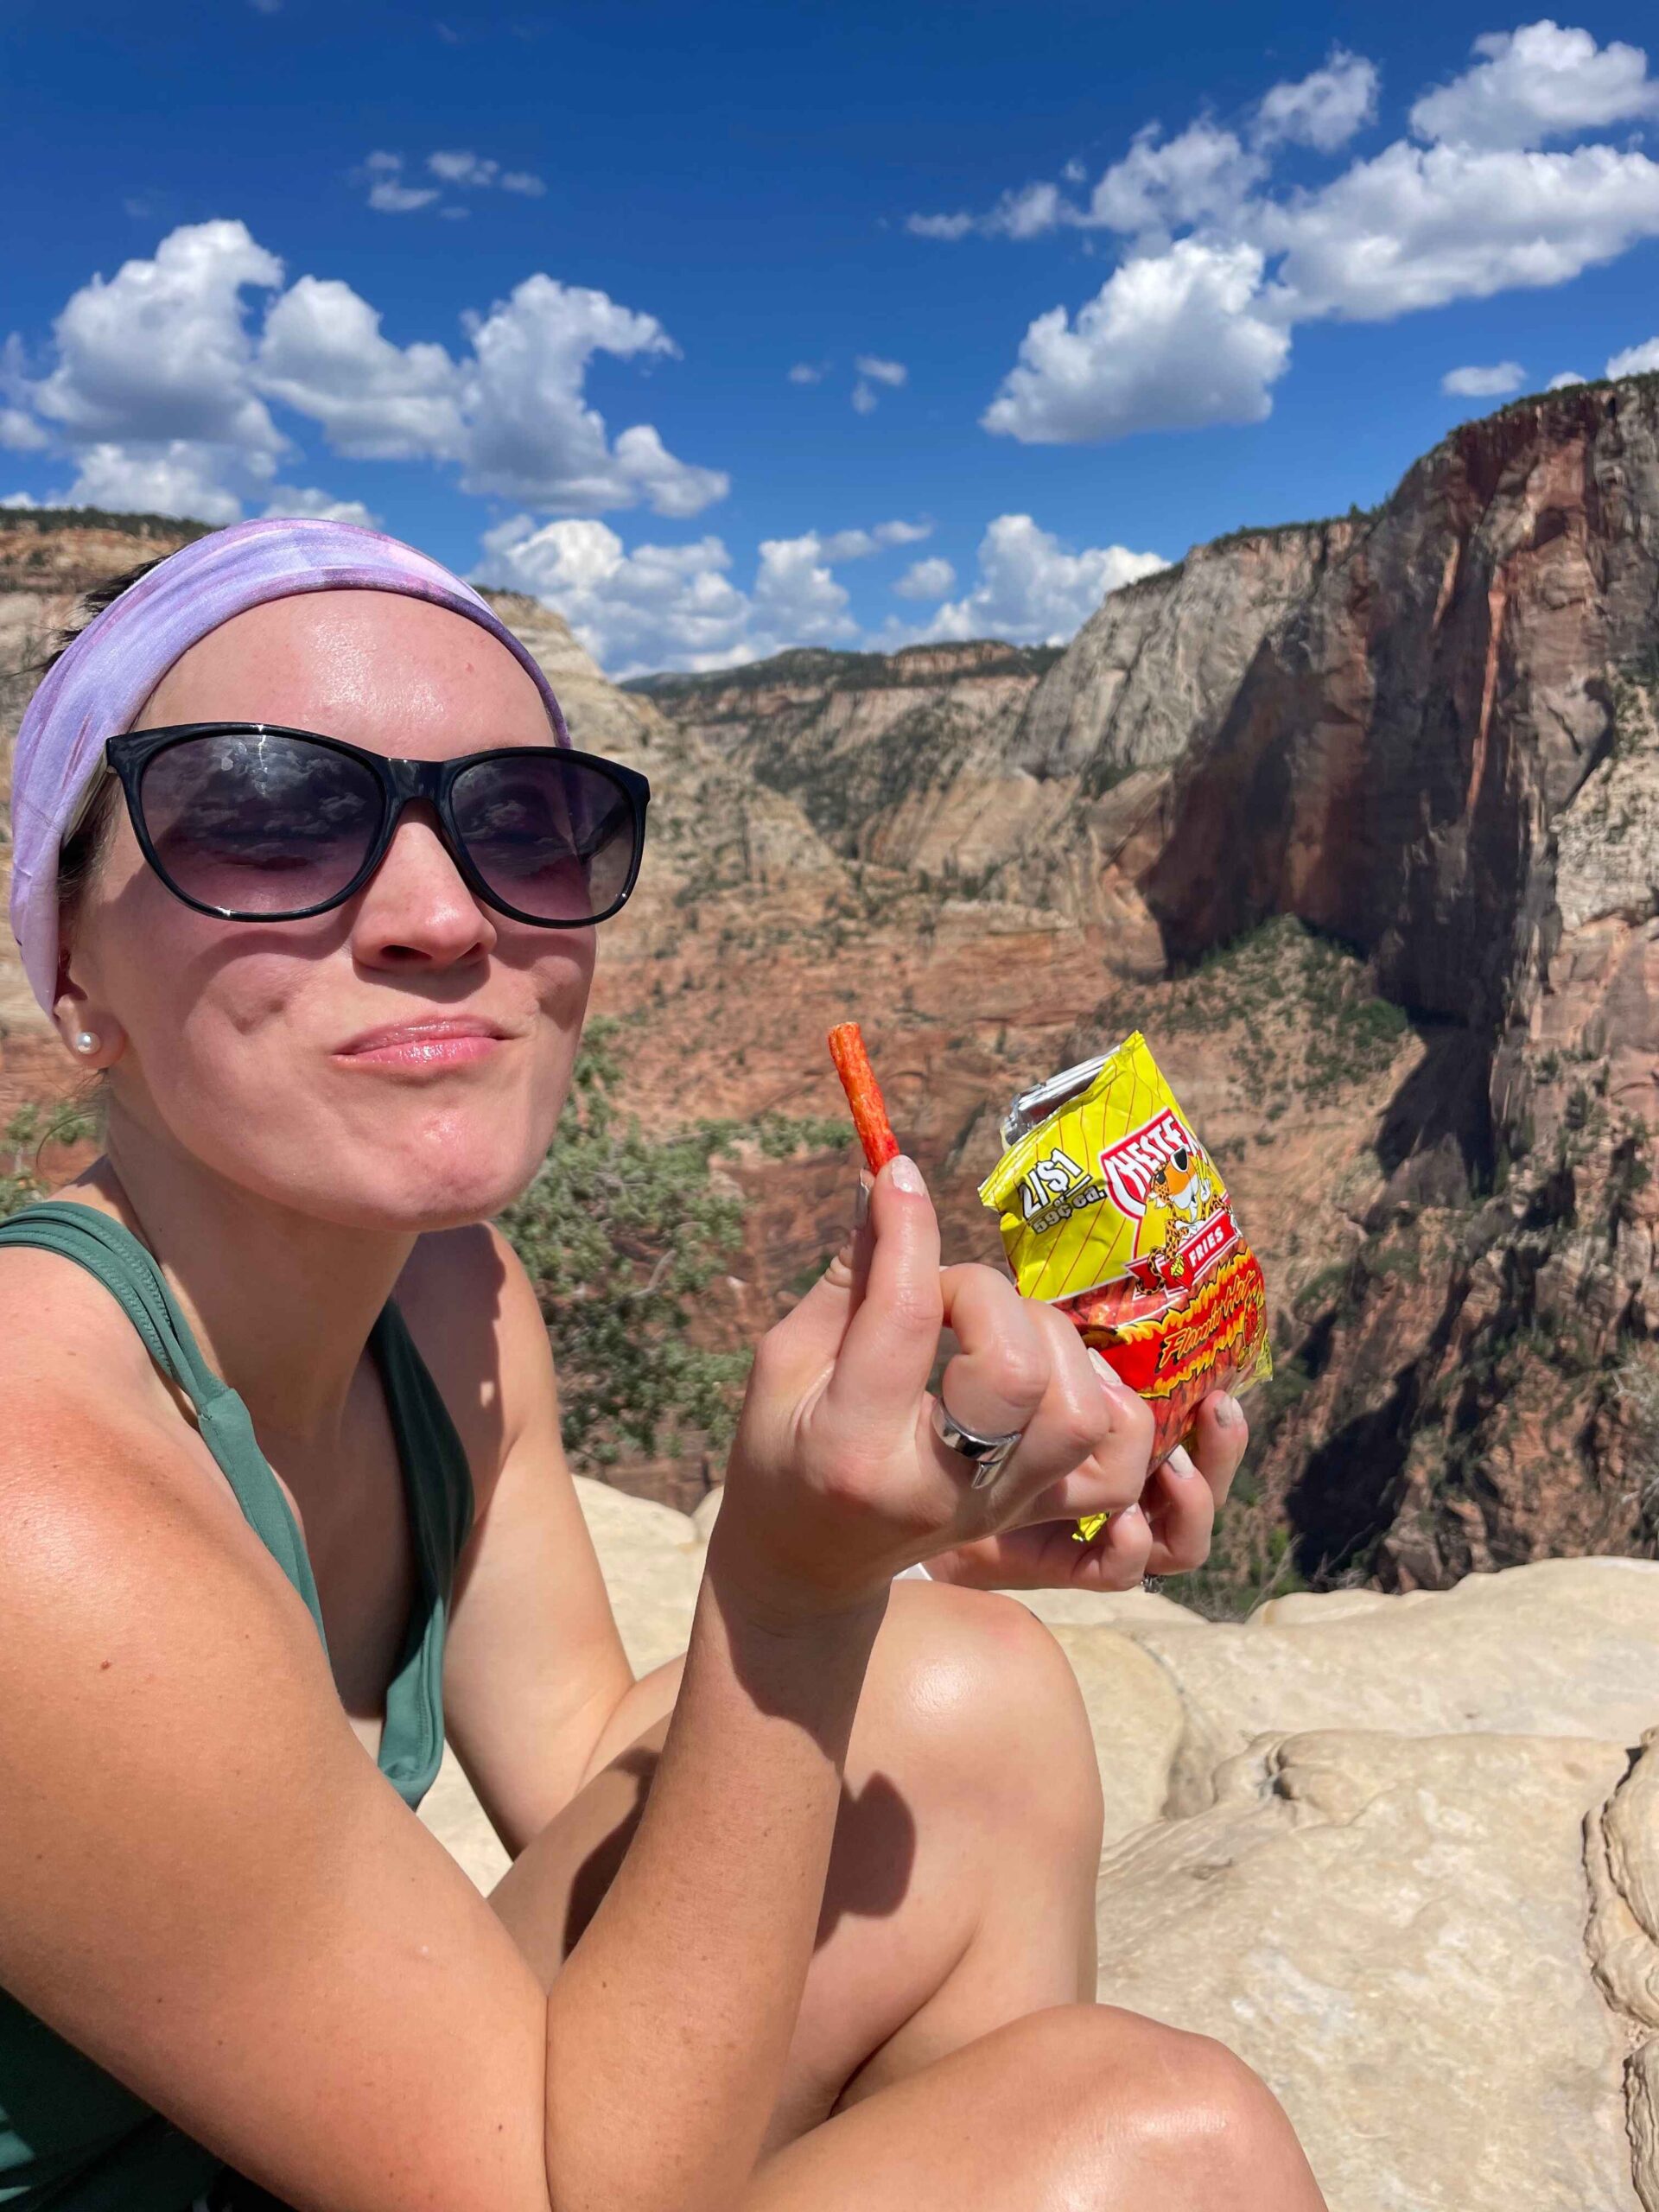
Of course, I had to celebrate with a bag of hot Cheetos. A few adorable chipmunk stayed close to us hoping I would drop my snacks, so we had some company. But otherwise it was super quiet and serene. We hung out for about 20 minutes and took some photos before heading back down.
After the Hike
The shuttle driver had told us that morning about a trail that leads you right from the end of the hike (Shuttle Stop 6, The Grotto) to Zion Lodge. Instead of waiting for the shuttle, we took that easy, flat 15 minute walk along the paved path to the lodge.
I highly recommend stopping here at the end of your hike for a beer, more water, a snack or just to relax and celebrate. They have an outdoor beer cart set up on the patio, which was closing at 5pm. So we barely made it in time for one drink. A nice vibe!

What it’s Like Hiking Half Dome
Yosemite Weekend Itinerary + Where to Eat
Hiking Packing List: Day Hike Essentials
The Perfect Yosemite 2-Day Itinerary
Frequently Asked Questions
How many deaths on Angels Landing Zion?
There have been at least 17 deaths reported from falling on Angels Landing Zion. Comparatively, this figure is much lower than the 60 reported deaths on Half Dome in Yosemite and over 400 on Mount Rainier.
Is Angels Landing dog friendly?
No. Dogs are not permitted in this area of Zion National Park.
Is hiking Angels Landing hard?
Hiking Angels Landing is not for beginners. The 5.4-mile strenuous hike includes steep switchbacks that ascend 1,488 feet.
Why is it called Angels Landing?
The name Angels Landing comes from a minister who visited the area over 100 years ago and said that peak was so high “only angels could land there”.
How long does it take to hike Angels Landing?
The average time to hike Angels Landing roundtrip is 3 – 5 hrs depending on your pace and physical condition. Parking and shuttles add additional time.
What is the elevation of Angels Landing?
Angels Landing is 1,488 ft in elevation.
Do you need a permit to hike Angels Landing in Zion?
Yes. Permits are required to hike along the ridge between Scouts Lookout and Angels Landing.
My Thoughts on Hiking Angels Landing
To sum it up, I would 10/10 recommend hiking Angels Landing to anyone who’s up for the challenge.
It was the perfect balance of adventurous, but not too scary. It was challenging but also easy to do in a half day; not nearly as physically challenging as the 16-mile trek of Half Dome. The view was gorgeous and it’s a memory I’ll hold on to forever.
Have you hiked Angels Landing? Drop me a comment and let me know your experience! Would you do it again? Favorite parts? Scale of 1-10, how scary was it for you?
Haven’t hiked it yet? Drop any questions in the comments.
It’s also currently my favorite place I’ve ever enjoyed a bag of Hot Cheetos, so there’s that. But who knows where life will take me.
Happy travels!
Hannah

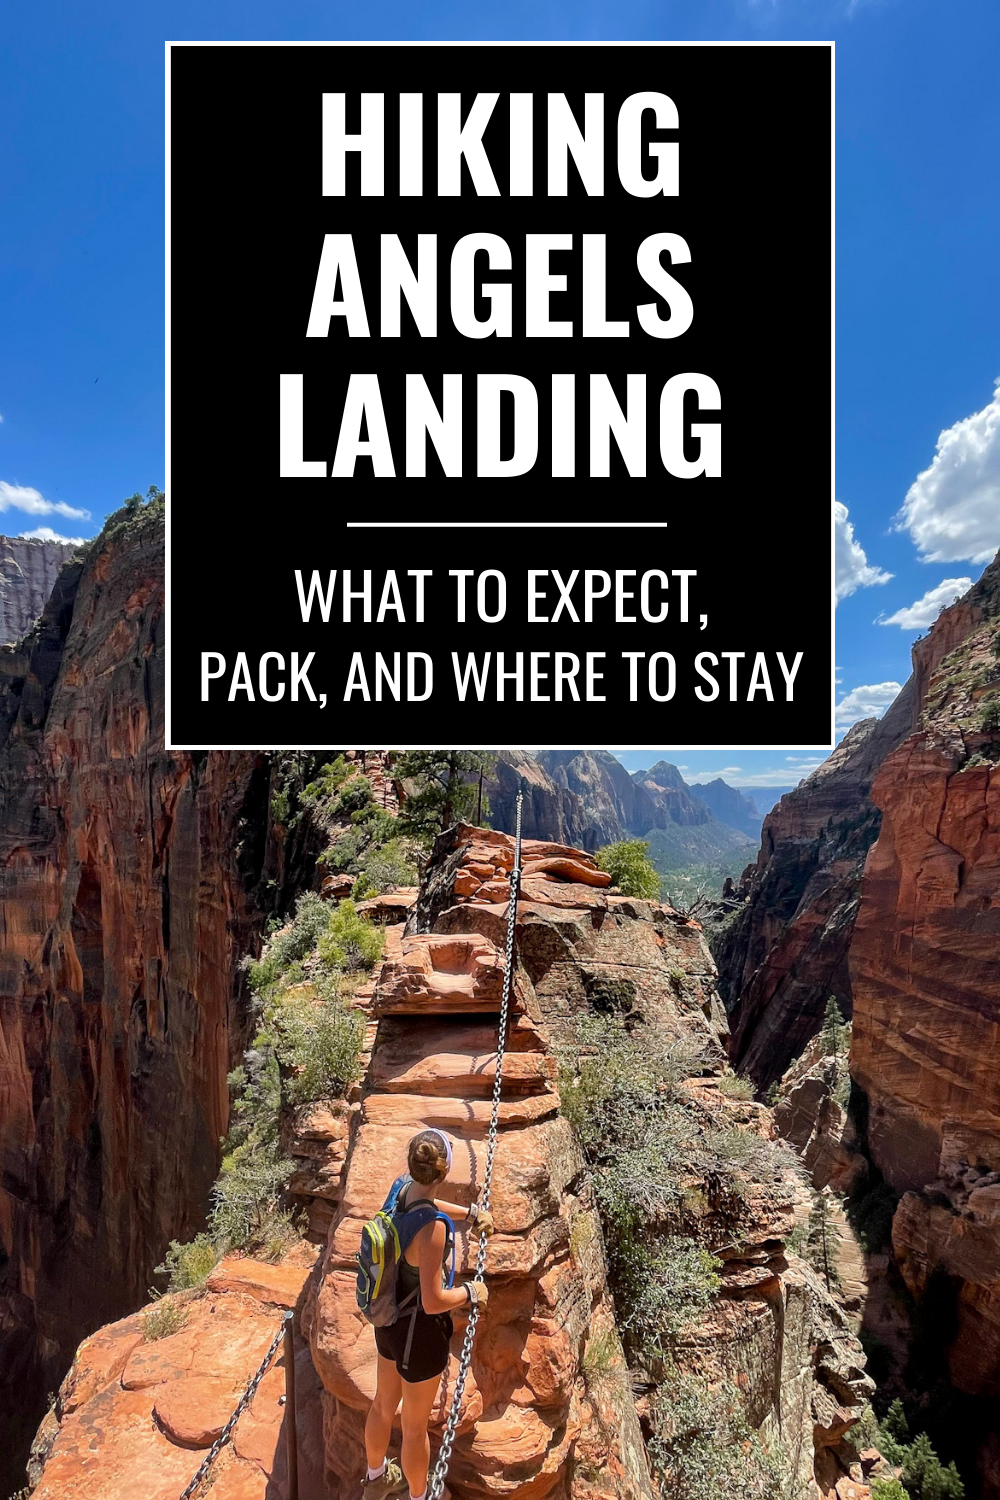
Plate & Compass
Plate & Compass is a food and travel blog written by Hannah Falkosky. After quitting her job and spending 8 weeks in Europe on just a few thousand dollars, she found her love for budget travel and sharing tips to help others explore the world. She also spent 15 years working with award-winning chefs and developed a love for artful food and cocktails. Hannah is now based out of Los Angeles, and when she’s not traveling she makes it her mission to explore the best restaurants and cocktail bars while living life to the fullest.